The Better Days Crochet Pillow

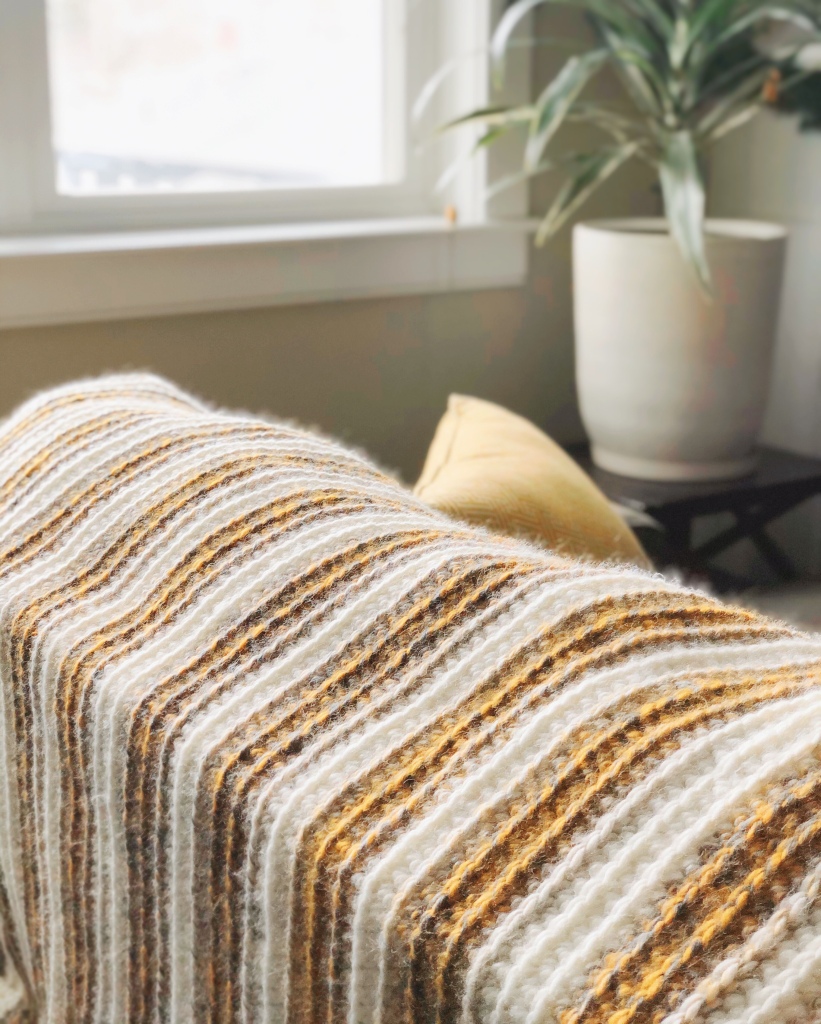
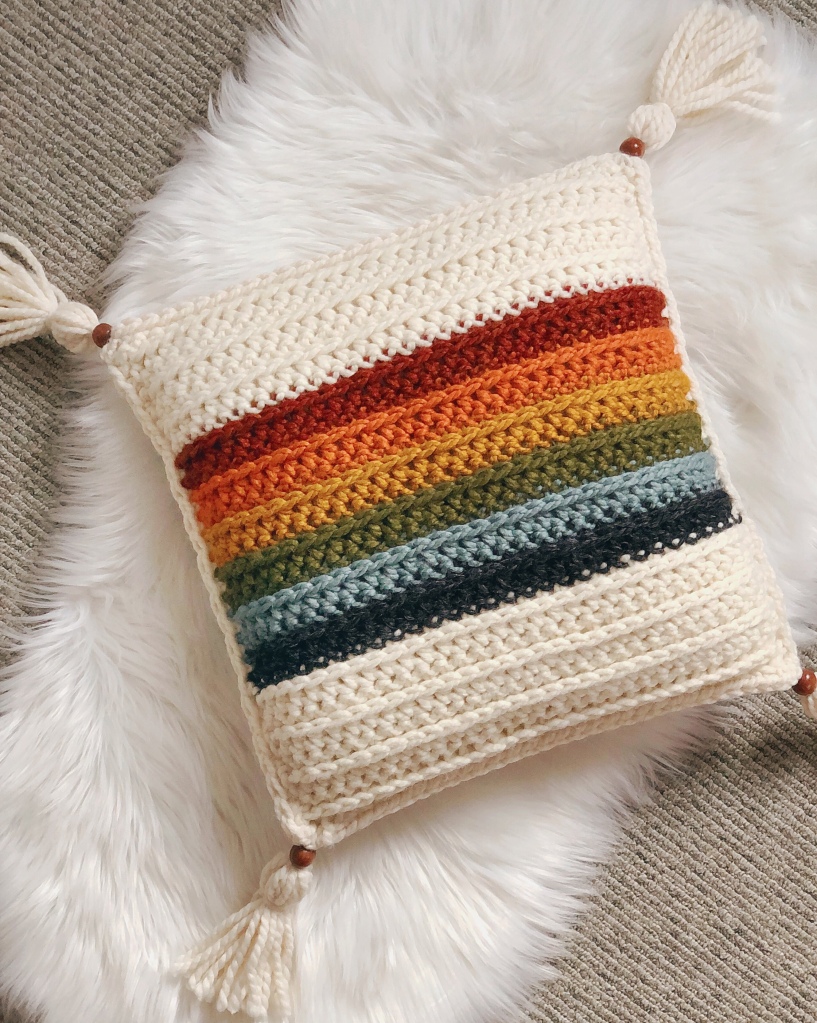
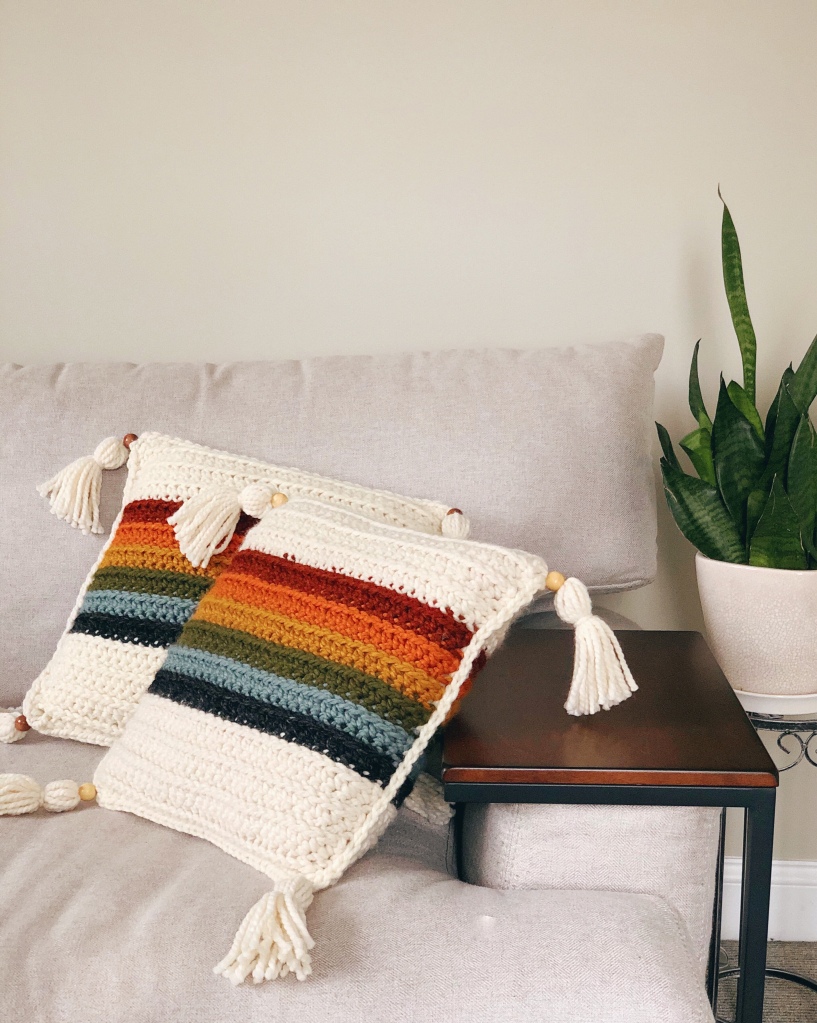
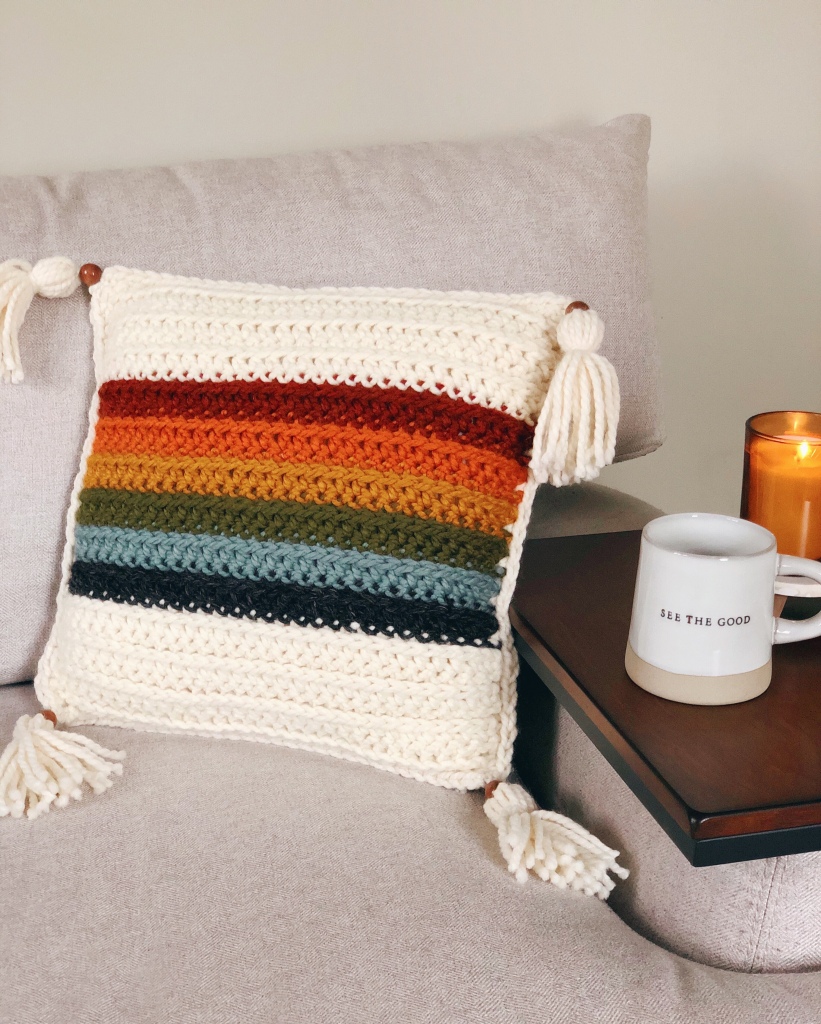
Every year when January rolls around and the Christmas decorations are finally put away I look around my living space and feel like it looks…boring. All the pretty lights and ornaments are gone and I’m craving brightness and something new. This year in particular I want to make my home as cozy as possible, and what’s better than a new set of throw pillows to brighten up the couch!

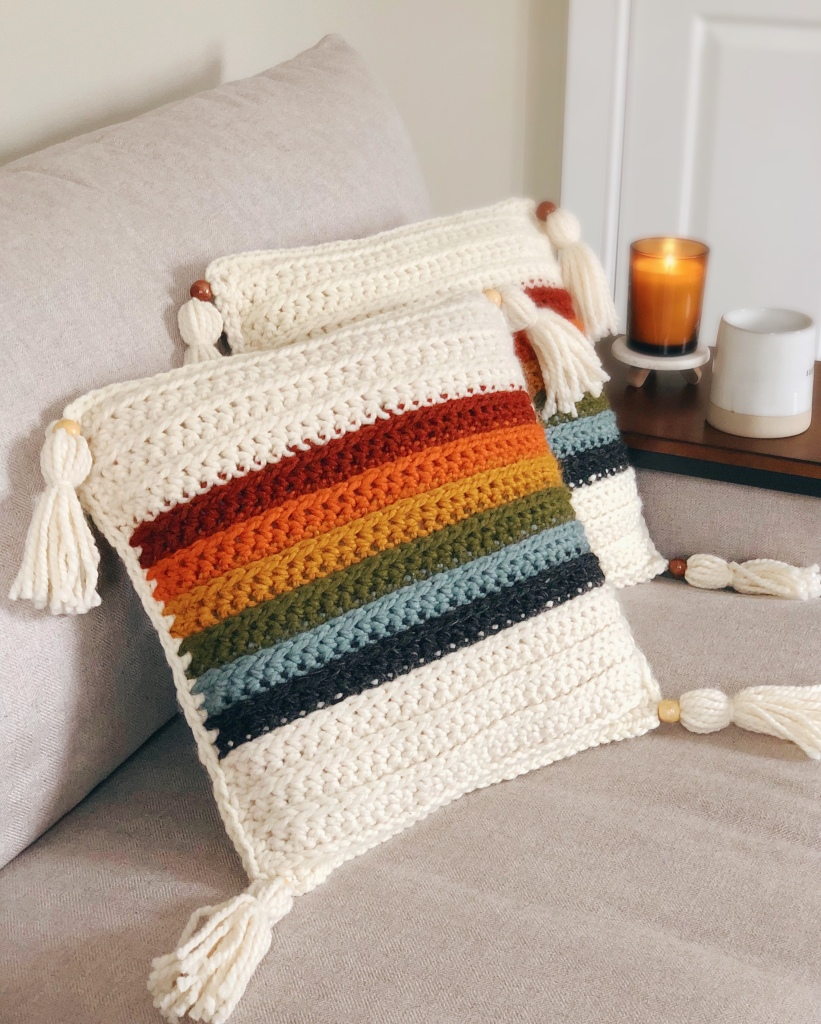
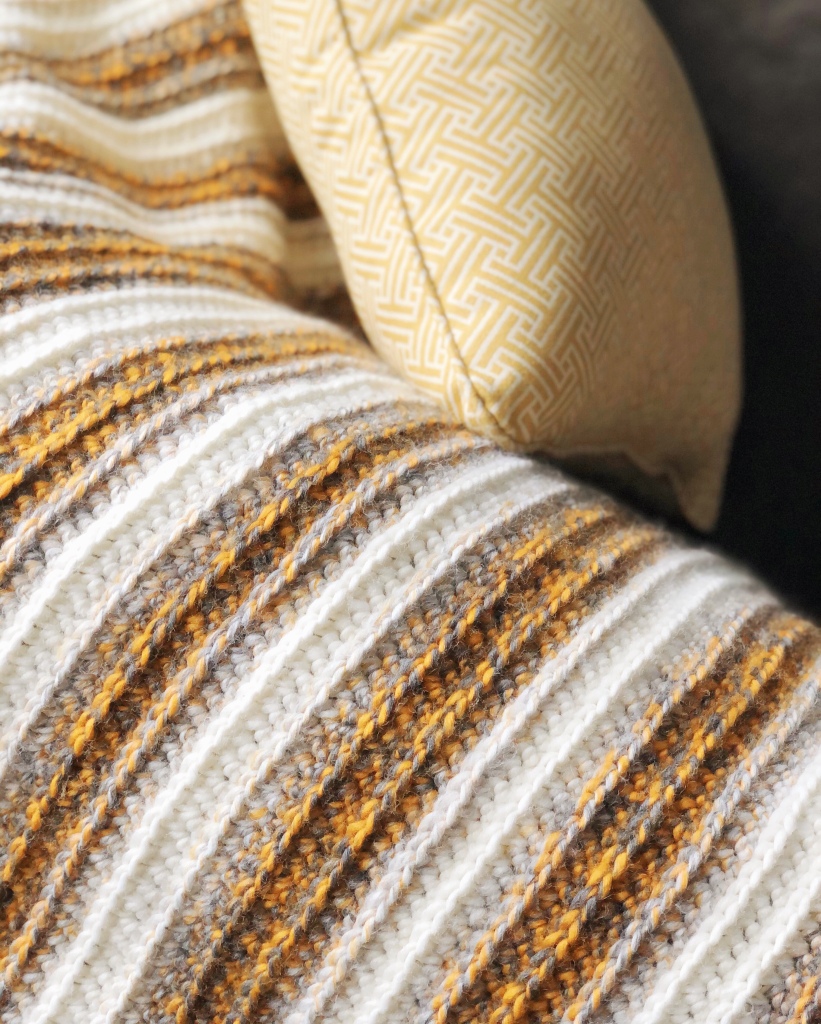
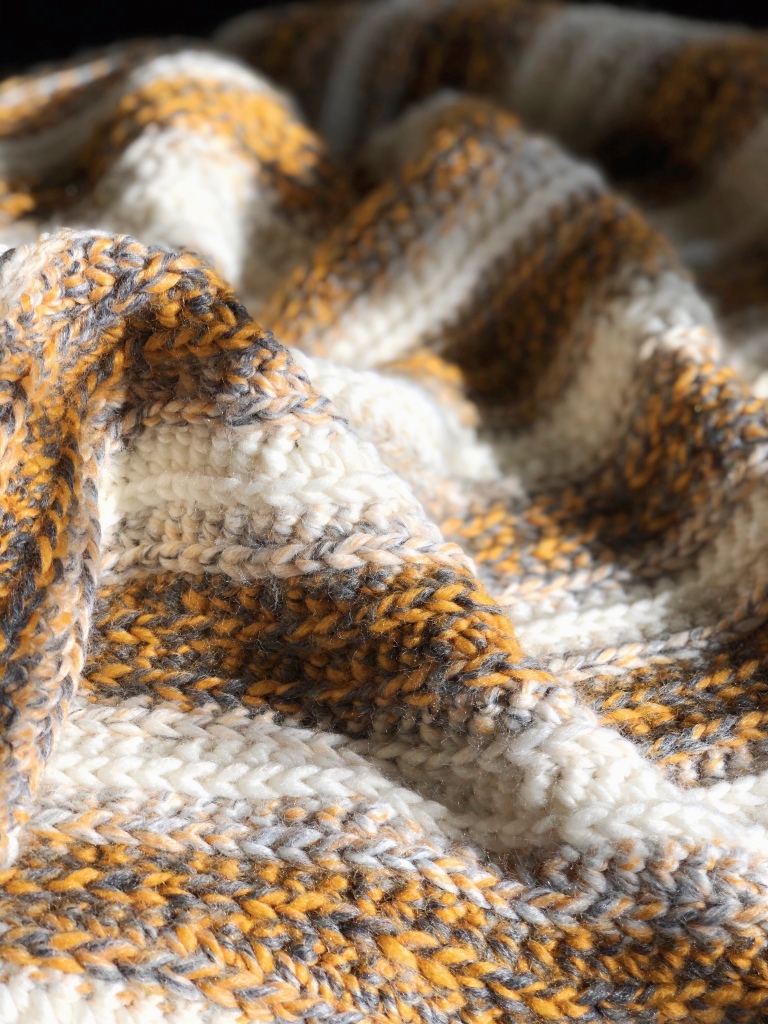
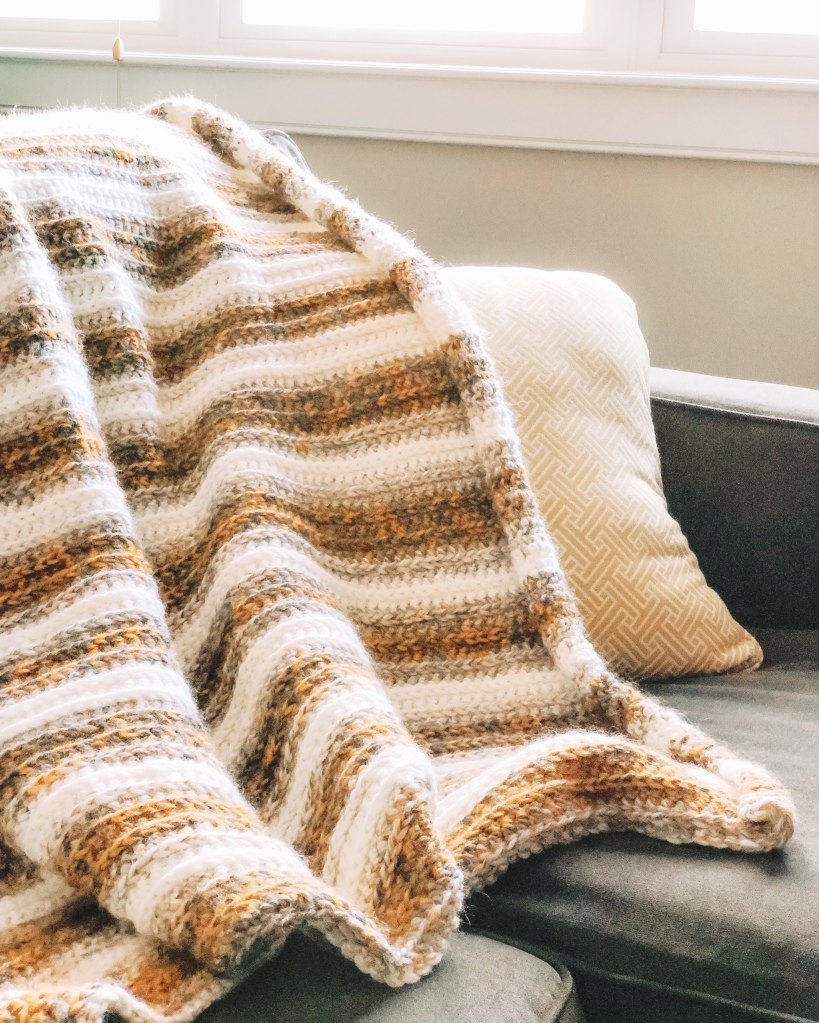
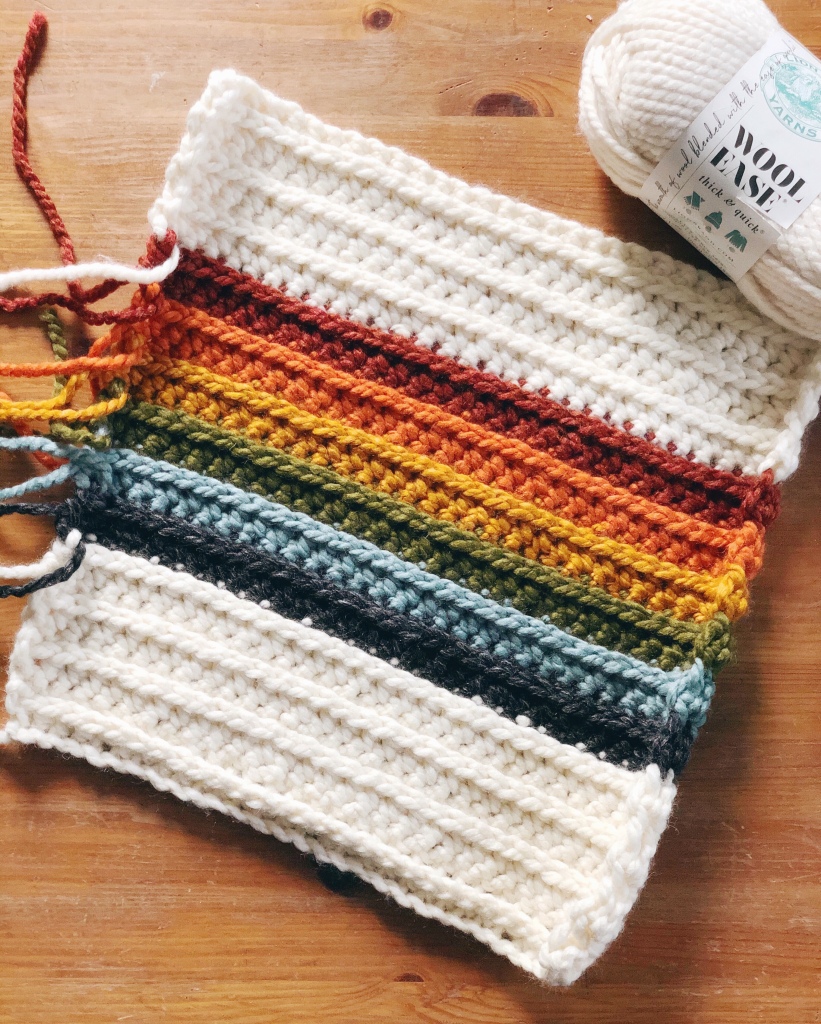
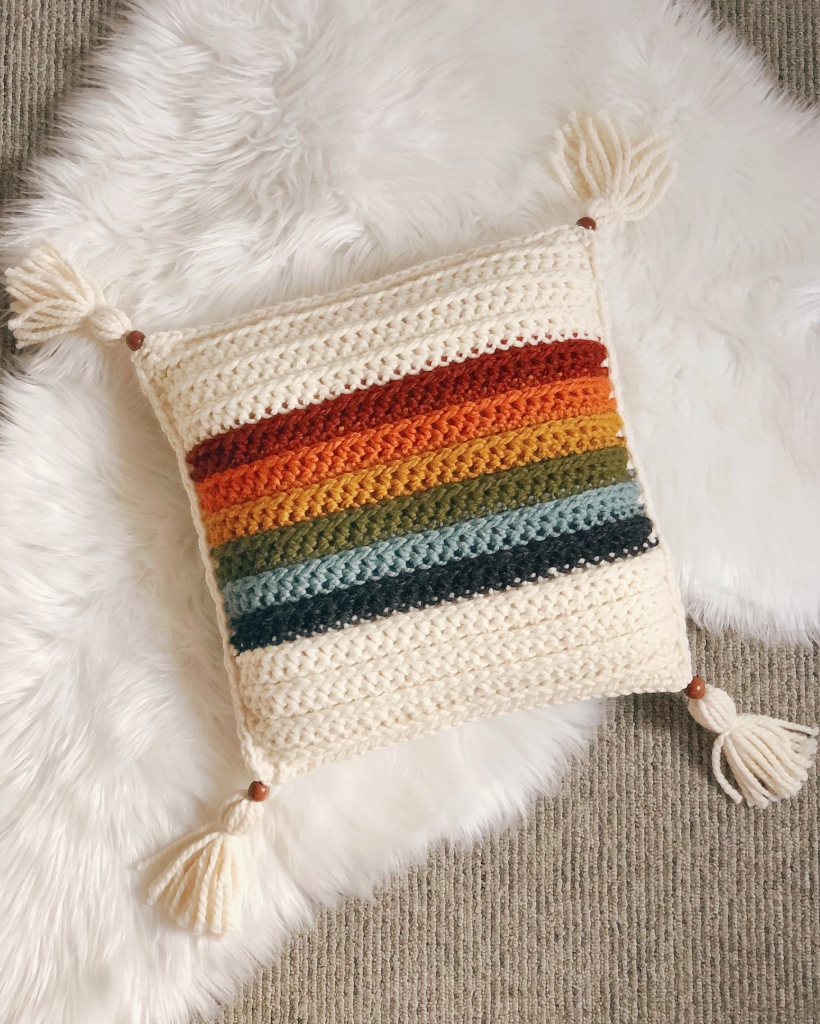
This pattern is beginner-friendly and uses the same stitch pattern as my Golden Hour Throw. You’ll use super bulky level 6 yarn (I chose Lion Brand Wool Ease Thick and Quick), so this is a fast project that you can finish in a day. The stitch repeat gives the pillow a subtle cable/knit look, and the color combinations are endless! I chose a muted rainbow for my pillows because rainbows are a symbol of hope. When times are tough it’s good to be reminded that there are better days ahead!

***I have a beautiful, low-cost version of this pattern available on my Etsy that includes pictorials and is printer-friendly. You can find the PDF here! ***

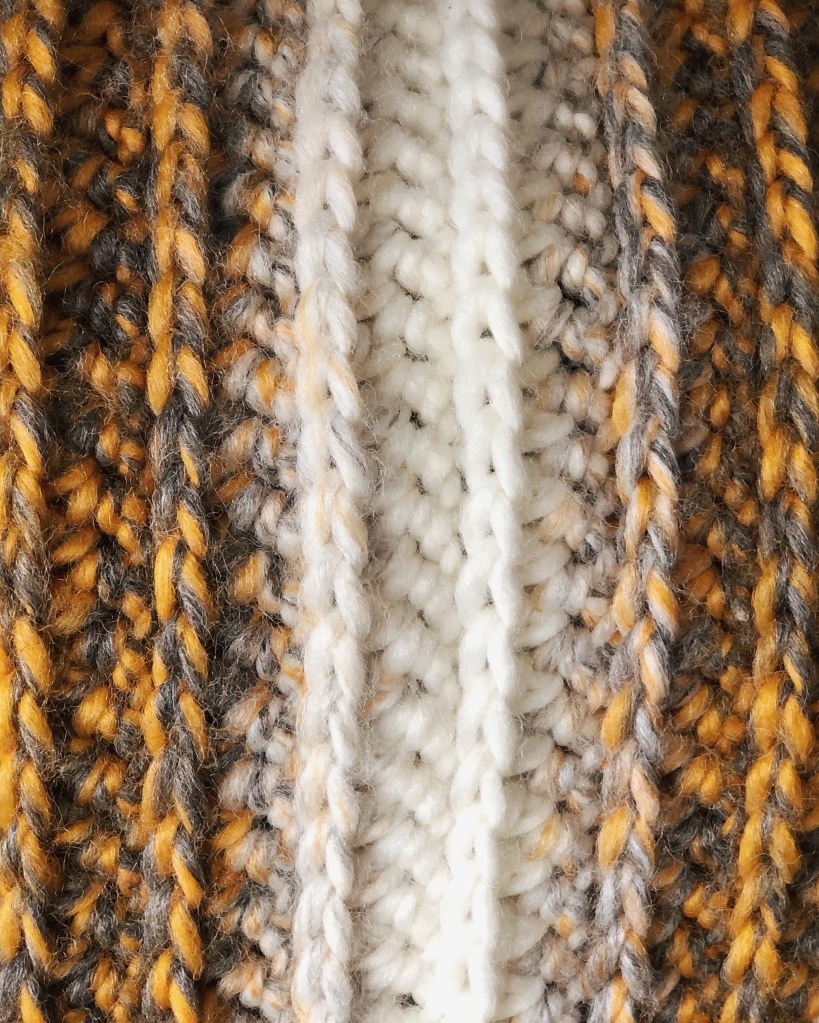
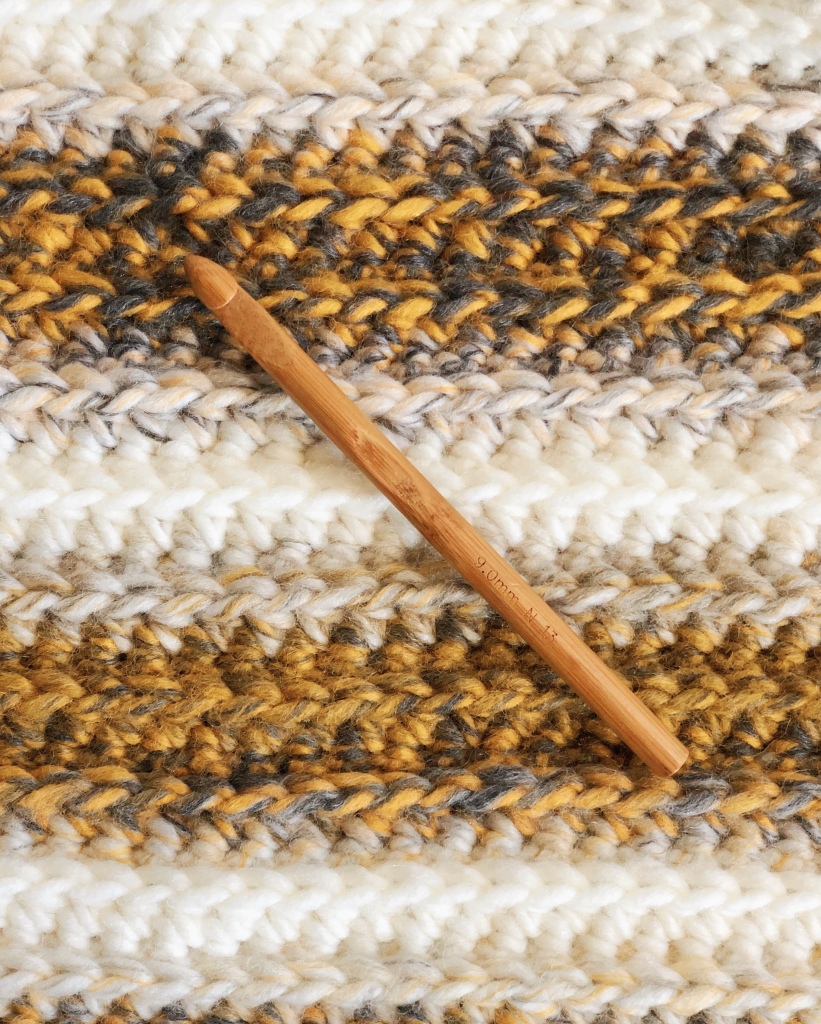
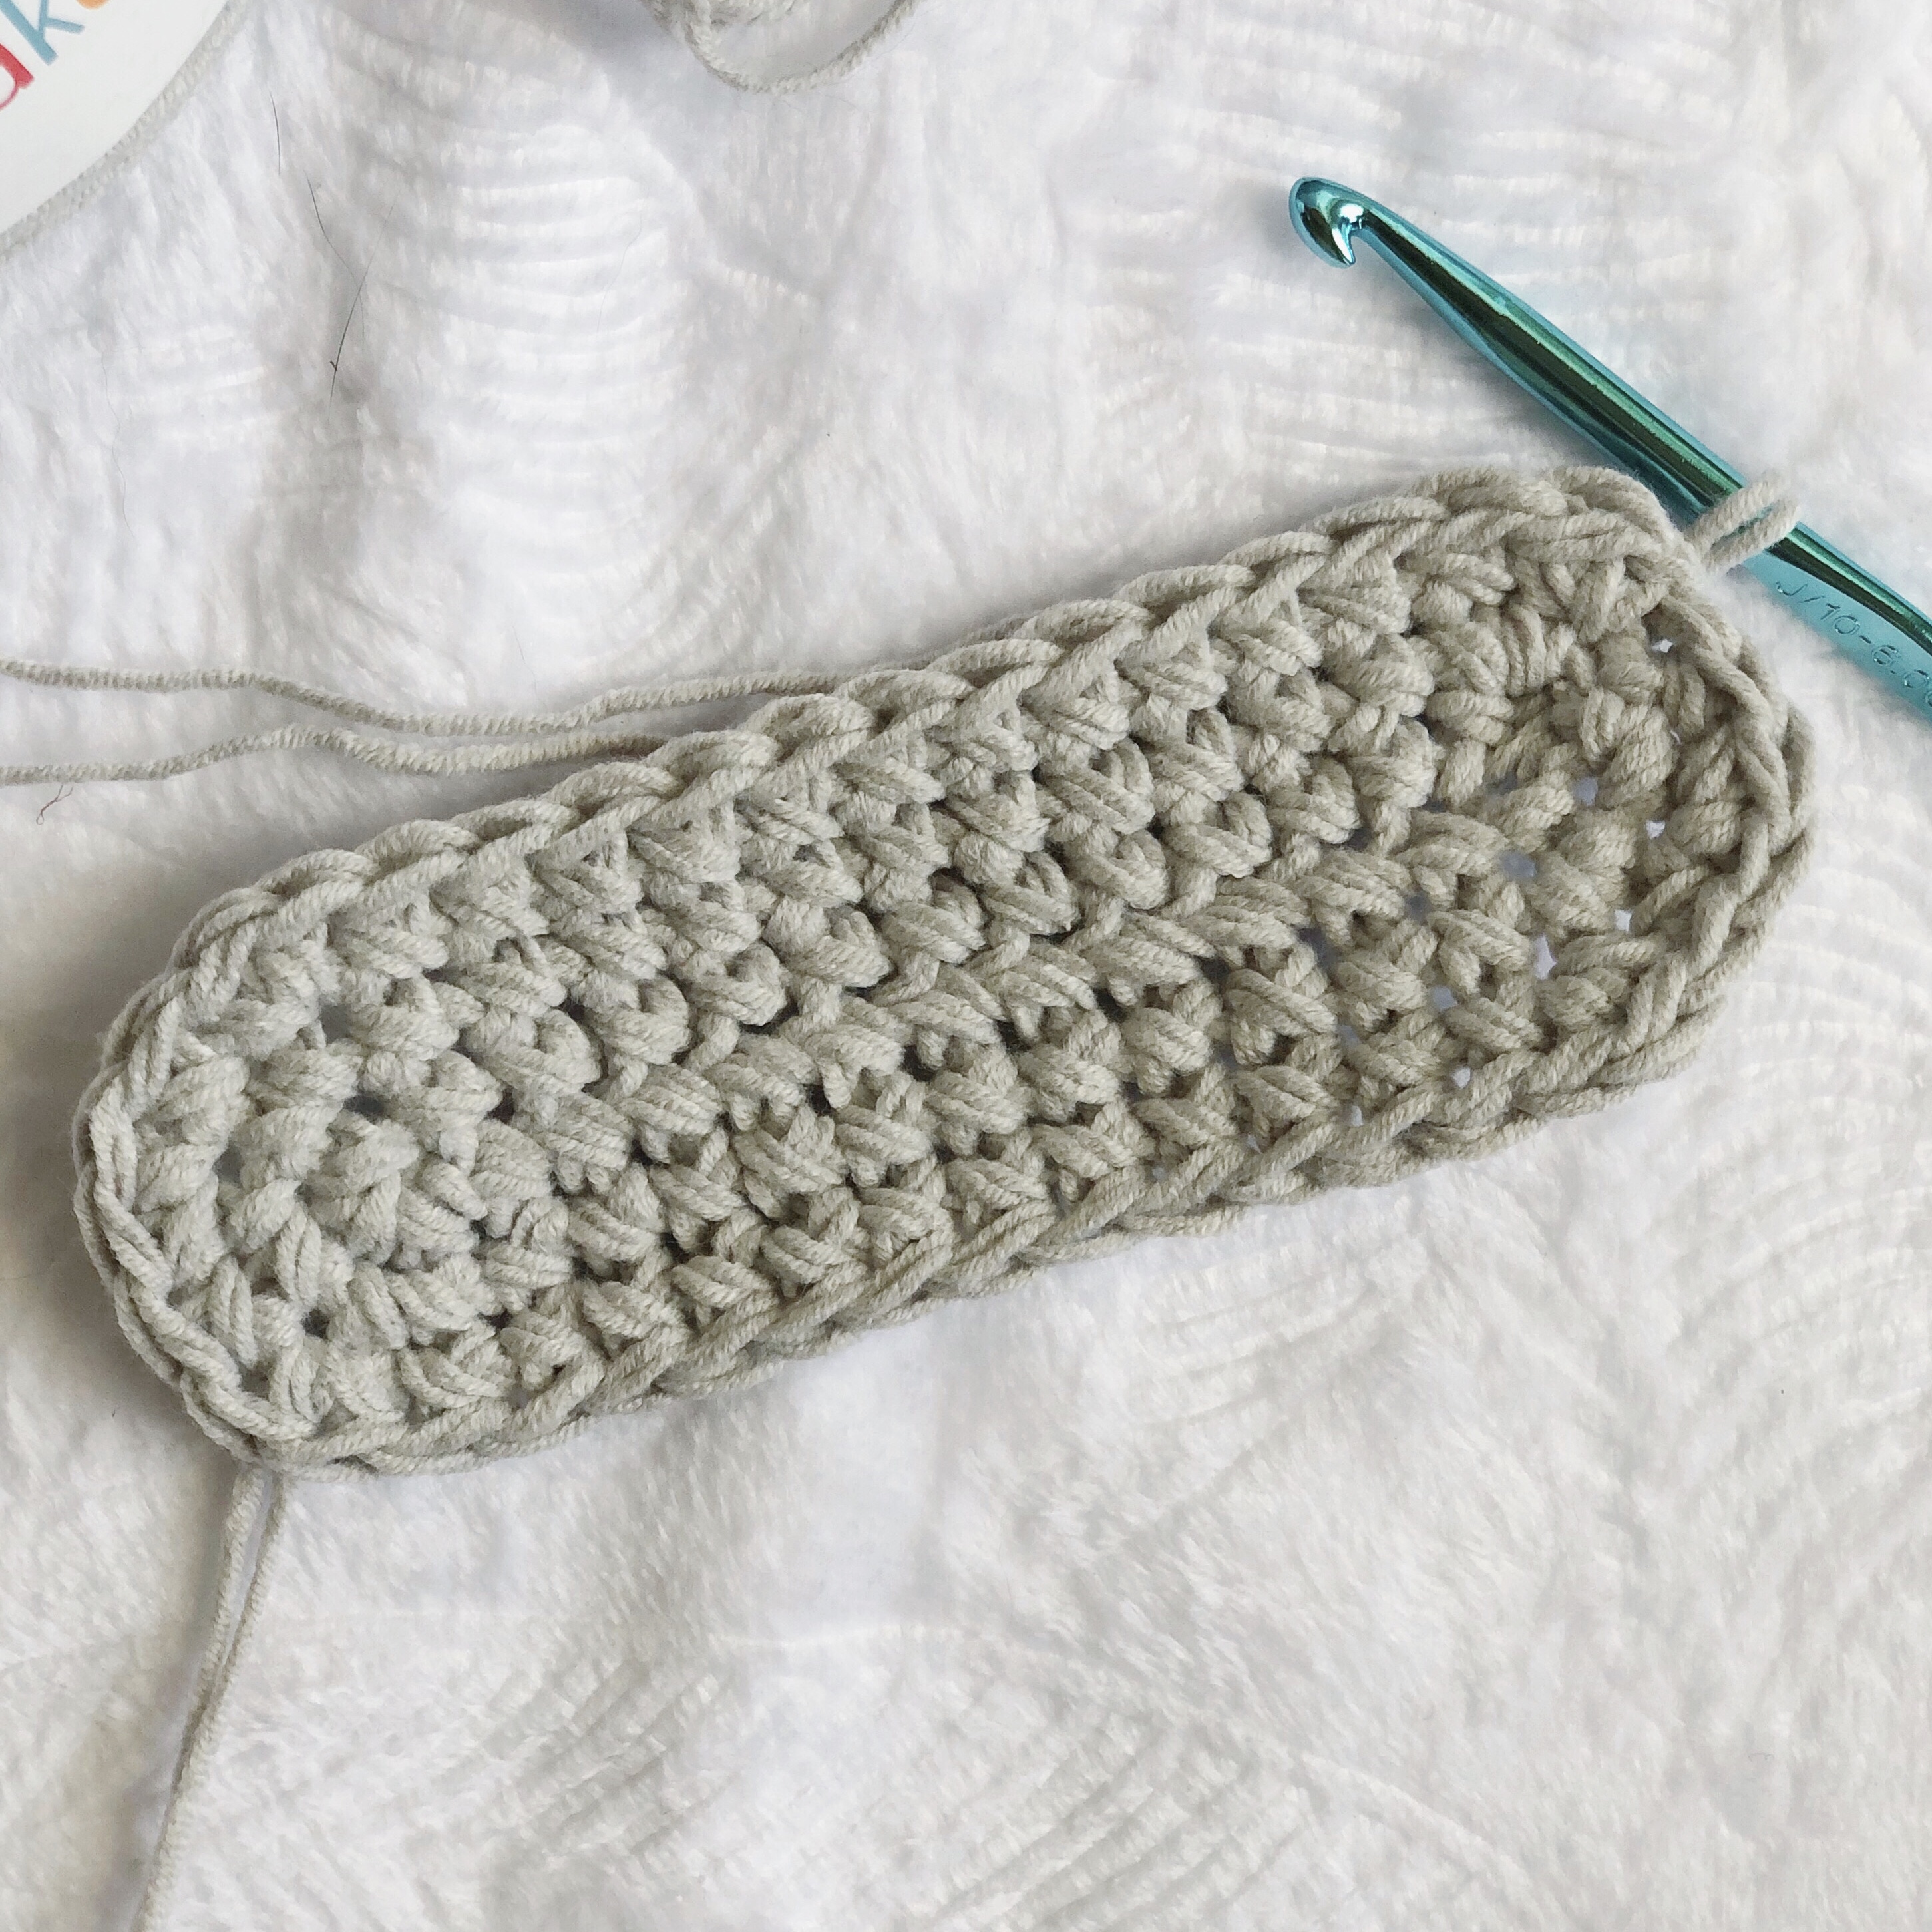
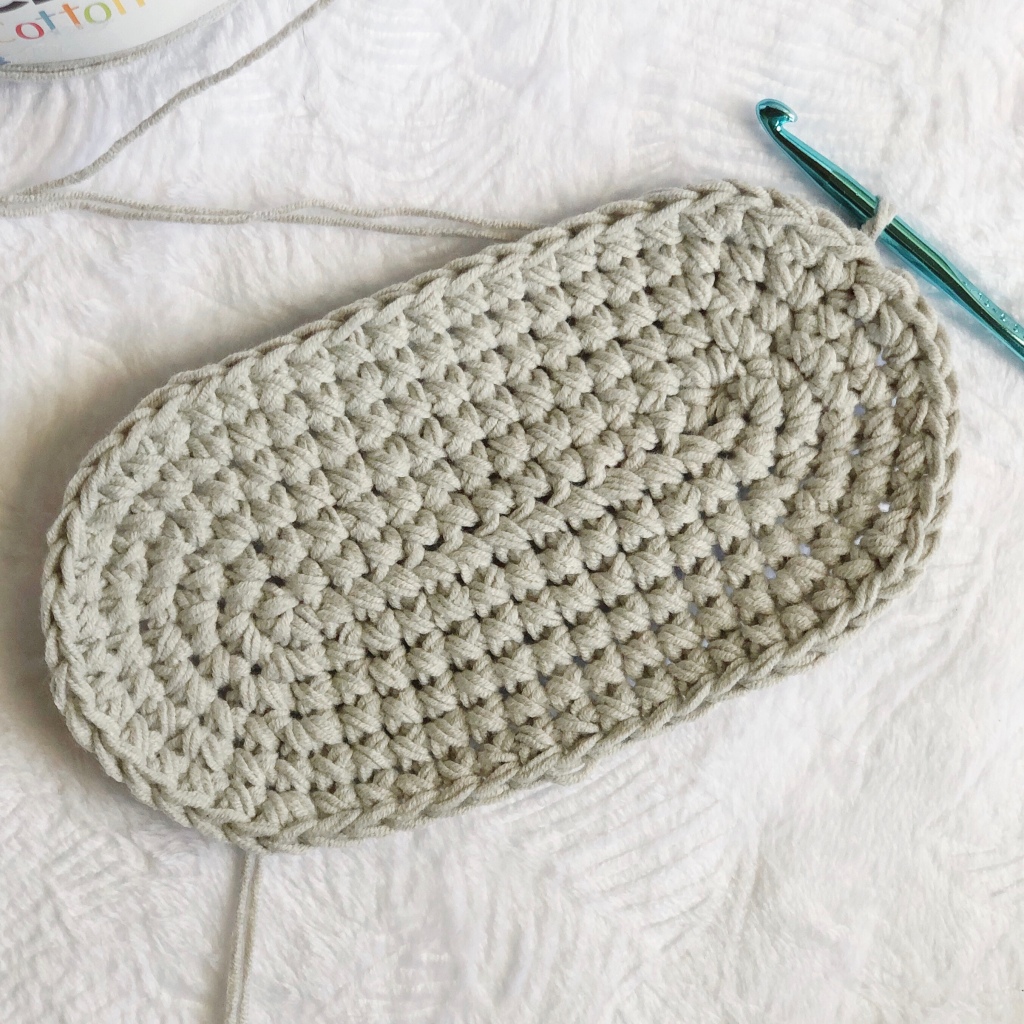
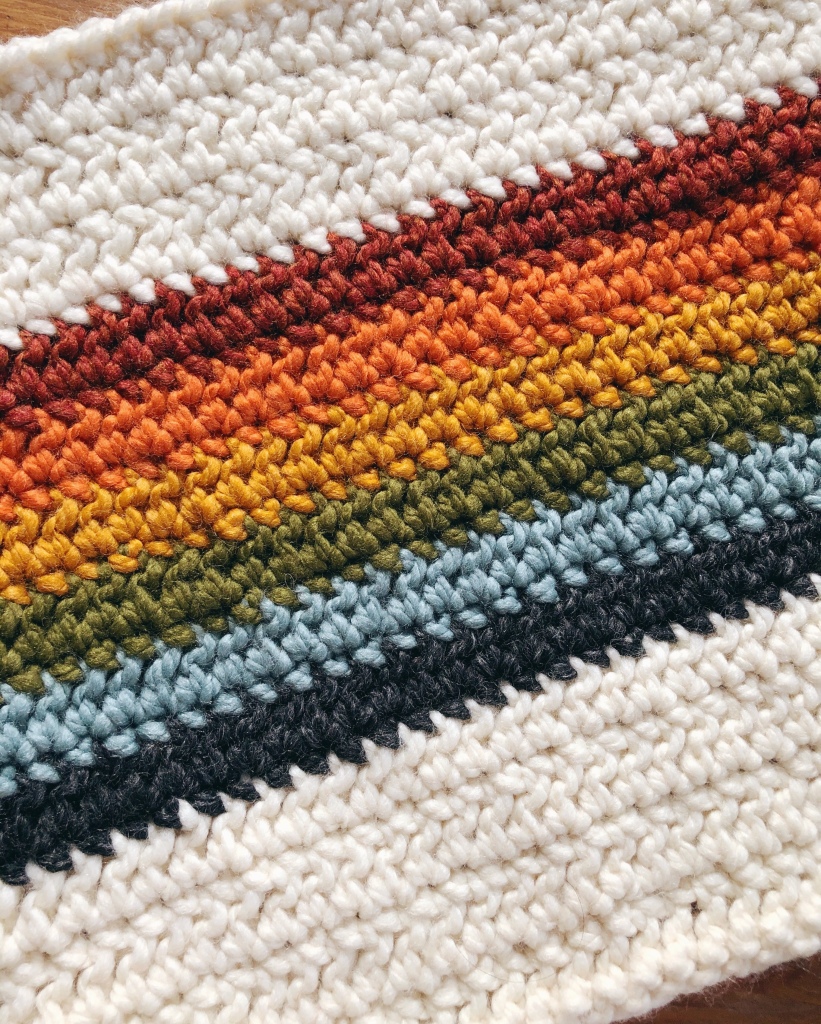
The technique used in this pattern that gives the raised braided texture to the pillow is single crocheting in the third back loop of the previous row of half double crochets. If you haven’t worked in this loop of a half double crochet before, you can see it pointed out with an arrow below when working on the back side of each panel.

The single crochets push the top two loops of the half double crochet down, so you get the great texture that looks a bit like knitting!

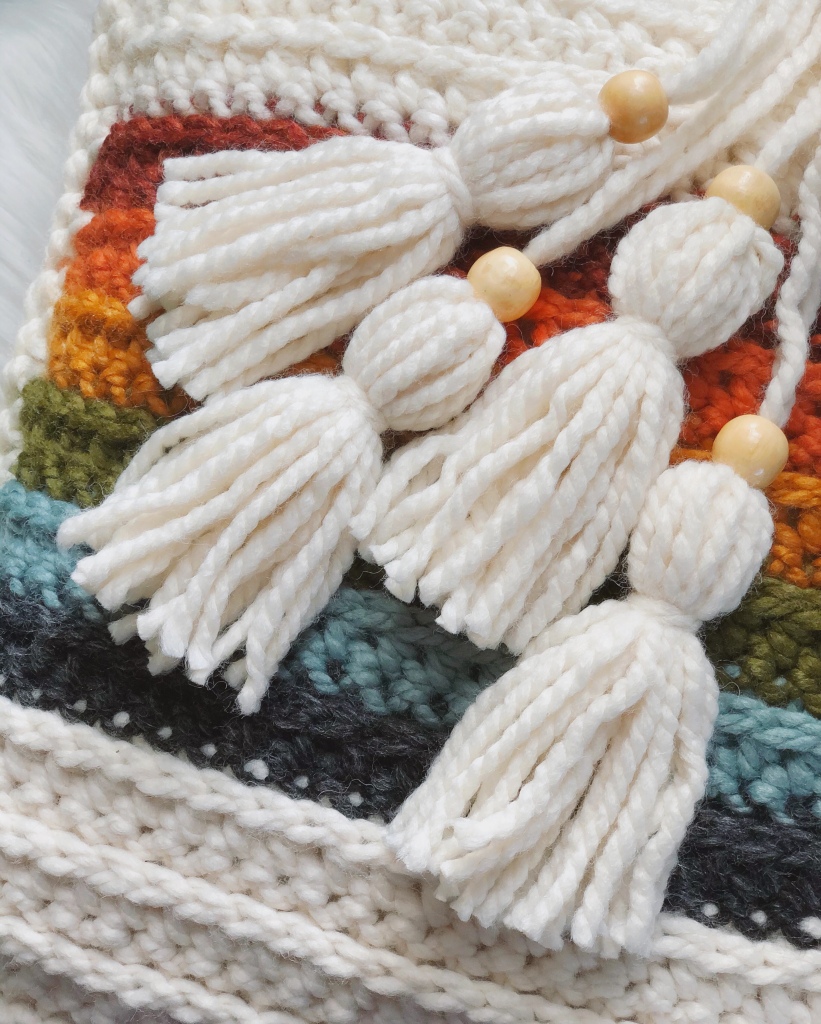
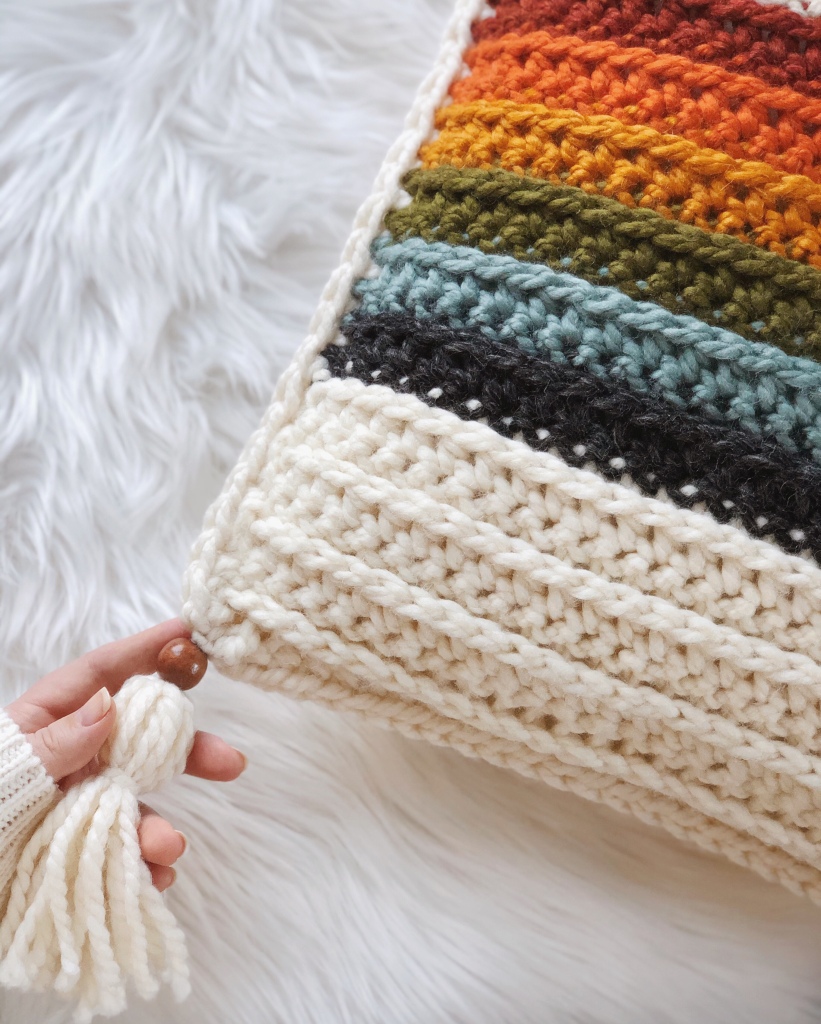
Once you complete two panels you’ll single crochet them together, insert a pillow form, and finish the pillow off with some cute tassels! Let’s get to the pattern.

If you’d like a printable, ad-free PDF of this pattern, you can grab that here!

BETTER DAYS PILLOW COVER PATTERN

Stitch abbreviations:

-Chain- (CH)

-Single Crochet- (SC)

-Half Double Crochet- (HDC)

-Stitch(es)- (ST(s))

Materials:

  • For one pillow: 2 balls of Super Bulky Level 6 yarn in main color, about 10 yards each of 6 assorted colors of Super Bulky yarn.
    • Shown is Lion Brand Wool Ease Thick and Quick in Fisherman for the main off white color, then for the rainbow Spice, Pumpkin, Butterscotch, Cilantro, Succulent, and Charcoal.
  • Size N/15 9mm crochet hook
  • 16×16” pillow insert
  • Large eye sewing needle
  • Scissors
  • Tape measure

Notes:

  • The SC rows are done in the third loop of the HDC’s. This loop is behind the top two loops of the HDC, and will be the loop closest to you on the wrong side of the blanket. See photos above for more details.
  • The chains at the beginning of each row do not count as stitches.

Final measurements:

Fits a 16×16” pillow form.

Gauge:

4×4” = 7 rows x 7 stitches

Pattern:

Using main color, CH 31.

Row 1: HDC in 2nd CH from the hook and in each CH across. (30)

R2: CH 1. SC in third back loop of each HDC across (see notes). (30)

R3: CH 1. HDC in each SC across. (30)

R4-7: Repeat rows 2 and 3 twice more with main color.

R8-9: Join yarn that will be the bottom of your rainbow (color 2). Repeat R2 and R3.

R10-11: Repeat R2 and R3 with color 3.

R12-13: Repeat R2 and R3 with color 4.

R14-15: Repeat R2 and R3 with color 5.

R16-17: Repeat R2 and R3 with color 6.

R18-19: Repeat R2 and R3 with color 7.

R20-26: Repeat R2 and R3 with Main Color. Cut yarn.

Right side of one panel.
Wrong side of one panel.

Make second panel. Do not cut yarn.

Holding the two panels with the wrong sides together, SC along the sides with 2 CH’s at the corners, 26 SC along each side and 30 SC along the top and bottom. When you’ve done three sides insert your pillow form and then SC the pillow cover closed.

Optional Tassels:

Using any of your colors, wrap the yarn around a 6” book 12 times. Tie a piece of yarn around the top of the bundle and cut the other end. Tie a second piece of yarn an inch from the top of the bundle and trim the bottom strands. Add a bead to the top piece of yarn and tie securely to the corner of the pillow. Make four tassels for each pillow.

I hope you enjoy this pattern and use it to add some color to your space! If you make one please tag me on Instagram because I love to see and share your work!

This is an original pattern by Christina of February Sky Designs.  Please do not claim this pattern as your own. If you wish to share this pattern, you may link to it but please do not reprint it on your site or sell it.

You may sell products made from this pattern but please clearly credit the design to me, Christina of February Sky Designs, and link to my blog februaryskydesigns.com. Thank you for respecting creators and their work!

Golden Hour Throw Blanket

January is here, and there’s nothing I want more than to snuggle up under a cozy blanket during these long winter nights. I was inspired by the beautiful Caron Swirl Cakes yarn to update my home décor and add some beautiful color and texture to my living room. The acrylic wool blend makes this blanket very warm without being too heavy or scratchy, and the gold, cream and gray tones are perfect for adding some brightness to these cold and dreary days!

The great thing about this throw, besides the lovely yarn, is the texture. Using just two simple stitches, you can achieve a knit look crochet blanket with a dense texture that will keep you warm all winter.

All you need for this pattern is Caron Swirl Cakes yarn, or a comparable bulky weight yarn, a size N crochet hook, and to know how to single crochet and half double crochet. It doesn’t get much easier than that! Let’s get to it…

GOLDEN HOUR THROW CROCHET PATTERN

Stitch abbreviations:

-Chain- (CH)

-Single Crochet- (SC)

-Half Double Crochet- (HDC)

-Stitch(es)- (ST(s))

Materials:

  • 7 balls of Caron Swirl Cakes in the color Gold Fusion, or 1750 yards of any level 5 Bulky yarn (acrylic wool blend)
  • Size N/17 9mm crochet hook
  • Large eye sewing needle
  • Scissors
  • Tape measure

Gauge:

4×4” = 8 rows x 10 stitches

Special Notes:

  • The SC rows are done in the third loop of the HDC’s. This loop is behind the top two loops of the HDC, and will be the loop closest to you on the back of the blanket.
  • Adjust the size to your liking. Any length chain can be used to start, and the two row repeat can be added to or subtracted from as needed!
  • The chains at the beginning of each row do not count as stitches.
  • The blanket will curl a bit on the sides due to the tension of the stitches. This is normal and will flatten as the blanket gets larger. A border can be added at the end to flatten it completely.

Pattern:

CH 122.

Row 1: HDC in the 3rd CH from the hook and in each CH across. (120 STs)

R2: Ch 1. SC in the 3rd back loop of each HDC (see notes). (120 STs)

R3: CH 2. HDC in each SC across. (120 STs)

R4-140: Repeat rows 2 and 3 for 140 rows, or until desired size. Cut yarn, weave in ends and enjoy!

Final measurements:

-52” (132 cm) wide, 70” (178 cm) long

I hope you enjoy this pattern! If you make a Golden Hour throw be sure to tag me in your pics on Instagram because I love to see your creations!

This is an original pattern by Christina of February Sky Designs.  Please do not claim this pattern as your own. If you wish to share this pattern, you may link to it but please do not reprint it on your site or sell it.

You may sell products made from this pattern but please clearly credit the design to me, Christina of February Sky Designs, and link to my blog februaryskydesigns.com. Thank you for respecting creators and their work!

The Inselberg Backpack Pattern

I’m new to hiking, and one of the first things I realized I needed (besides bug spray!), was a bag to keep my hands free and hold the essentials. I didn’t want a full-size backpack, but it needed to be big enough for a water bottle and snacks. I figured I could make a bag that would check all the boxes, and that’s how the Inselberg backpack was created!

Having taken it out on the trails a few times now I can attest that it’s the perfect size to carry all the essentials, and the color possibilities are endless! Using Caron Cotton Cakes yarn and holding two strands together creates a durable and structured bag that’s still lightweight and won’t slow you down. Read on to see how to make your own Inselberg Backpack, and become the outdoorsy person you’ve always wanted to be! (And still have cute accessories.)

Inselberg Backpack Pattern

Stitch abbreviations:

-Chain (CH)

-Skip (SK)

-Stitch (ST)

-Single Crochet (SC)

-Two Single Crochet (2SC)

Materials:

  • J/10 (6 mm) Crochet Hook
  • I/9 (5.5 mm) Crochet Hook
  • Two skeins worsted weight level 4 yarn, 100% cotton or a cotton/acrylic blend, about 300 yards each. (Different colors are optional. Pictured is Caron Cotton Cakes in Silver Cloud and Fruit Tropical.)

Notes:

  • The Inselberg Backpack is made by holding two strands of yarn together simultaneously to create a stronger structure.
  • The rounds are joined by an invisible slip stitch and each round is started with a chainless single crochet, which counts as one SC. If you’re not familiar with these techniques you can see a more detailed tutorial here or use a standard slip stitch and chain 1 at the beginning of each row, which will not count as a stitch.
  • The chart below shows how to make the bag base. The instructions are also written out in the pattern directions with accompanying photos. The body of the bag is made in joined rows without any increases.
  • The oval base can be thought of as two half circles on either end of a rectangle. The middle of the rectangle will always be 11 SC’s, which is why they are written out separately in the pattern instructions to help keep track of where the increases go.
  • The colors of the bag are entirely up to you! I joined the Fruit Tropical yarn a couple rows above the base and then re-joined the Silver Cloud yarn at the top, but your version can be whatever you’d like!

Techniques used:

-Invisible Slip Stitch – Photo Instructions here.

-Chainless SC – Photo Instructions here.

-Crochet I-cord – Instructions by Yarnspirations

-Thermal Stitch – Youtube video by Sewrella

PATTERN INSTRUCTIONS:

Base:

CH 14.

Round 1: SC in 2nd CH from hook. SC in the next 11 CH’s. 3SC in final CH. Turn, SC in the bottom CH strand of the next 11 CH’s. 2SC in last CH. Join to 1st SC of round with an invisible SL ST (see notes). (28 ST)

R2: 2SC, SC 11, 2SC in the next 3 ST, SC 11, 2SC in the next 2 ST, join. (34 ST)

R3: 2SC, SC, SC 11, 2SC, SC, 2SC, SC, 2SC, SC, SC 11, 2SC, SC, 2SC, SC, join. (40 ST)

R4: SC 2, 2SC, SC 11, SC 2, 2SC, SC 2, 2SC, SC 2, 2SC, SC 11, SC 2, 2SC, SC 2, 2SC, join. (46 ST)

R5: 2SC, SC 3, SC 11, 2SC, SC 3, 2SC, SC 3, 2SC, SC 3, SC 11, 2SC, SC 3, 2SC, SC 3, join. (52 ST)

R6: SC 3, 2 SC, SC, SC 11, SC 3, 2SC, SC 4, 2SC, SC 4, 2SC, SC, SC 11, SC 3, 2SC, SC 4, 2SC, SC, join. (58 ST)

R7: SC, 2SC, SC 5, SC 11, 2SC, SC 5, 2SC, SC 5, 2SC, SC 5, SC 11, 2SC, SC 5, 2SC, SC 4, join. (64 ST)

R8: SC 5, 2SC, SC 2, SC 11, SC 4, 2SC, SC 6, 2SC, SC 6, 2SC, SC 2, SC 11, SC 4, 2SC, SC 6, 2SC, SC 1, join. (70 ST)

Body:

R9-41: SC around. (70 ST)

R42: SC 3, CH 1, SK 1, *SC 6, CH 1, SK 1*, repeat from * to * 6 times, SC 3, join. (70 ST)

R43: SC around in all SC’s and CH spaces. (70 ST)

R44: SC around. Fasten off and weave in ends. (70 ST)

I-cord:

Using 1 strand of yarn and a I/9 5.5mm hook, create an iCord that is 42 inches long. See Techniques for tutorial link.

Weave the I-cord through the CH spaces you made in Round 42, making the ends stick out of the front two holes so you can cinch the bag closed.

If you’d like to make a loop for hanging the bag, make another I-cord that is 6 inches long and attach it to the top back center of the bag body, just below the cinch cord.

STRAPS:

For Thermal Stitch tutorial, see link in Techniques section.

CH 7.

SC in 2nd CH from hook and each CH across (6 ST).

CH 1, turn. SC thermal stitch until strap measures 30 inches (adjust to preference, as it will stretch a bit when used).

Make 2. Attach each strap to the top center of the back under the cord and on either side of the bottom just above the base oval (see photos).

Final measurements:

Width: 11”/28 cm

Height: 11”/28 cm from top of bag to start of base, 14”/36 cm from top of bag to center of base.

I hope you’ll make your own Inselberg backpack to take on all your outdoor activities this summer! If you do, be sure to tag me on Instagram so I can share your work! Happy hiking!

This is an original pattern by Christina of February Sky Designs. Please do not claim this pattern as your own. If you wish to share this pattern, you may link to it but please do not reprint it on your site or sell it.
You may sell products made from this pattern but please clearly credit the design to me, Christina of February Sky Designs, and link to my blog februaryskydesigns.com. Thank you for respecting creators and their work!