


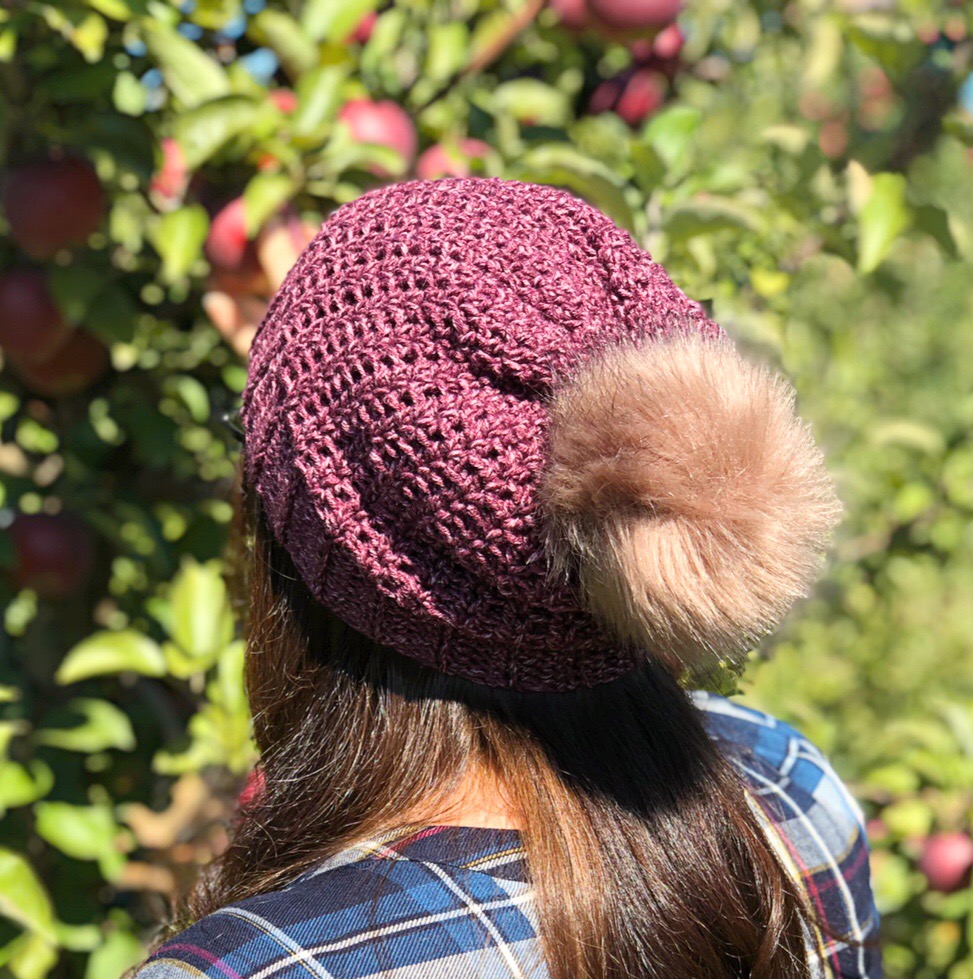
There are few things that make me more excited about life than when the leaves start turning, apples are filling branches and pumpkins are popping up in the fields- I’m talking about fall! I have been so inspired this season, and one thing I knew I needed to create was a soft, slouchie, and lightweight beanie for the chilly fall days and nights. I named this hat the Braeburn Beanie in honor of the apples that fill the orchards this time of year.
I used two of my current favorites for this easy beginner beanie- Lion Brand Jeans yarn and the Half Double Crochet V-stitch. This is a simple stitch that will make a really great texture on your beanie. Any worsted weight yarn will work but Jeans is soft and silky and makes the perfect hat. If you can get your hands on the Colors line, I used Cordoroy, the pretty plum color that I can’t get enough of.
Let’s get to the pattern!

The Braeburn Beanie Crochet Pattern
Stitch abbreviations:
-Chain (CH)
-Slip Stitch (SL ST)
-Single Crochet (SC)
-Half Double Crochet (HDC)
– Half Double Crochet V-Stitch (HDCV)
-Half Double Crochet 2 Together (HDC2TOG)
Special Stitches:
– Half Double Crochet V-Stitch (HDCV): 1HDC, CH 1, 1HDC in the same stitch
–Half Double Crochet 2 Together (HDC2TOG): Yarn over, insert hook into first stitch, yarn over and pull up one loop (three loops on hook). Insert hook into second stitch, pull up a loop (four loops on hook). Yarn over and pull through all four loops.
Note:
A technique used in this beanie is the invisible slip stitch and chainless half double crochet. If you’re unfamiliar with those techniques check out my simple summer market bag pattern for a detailed explanation with lots of pictures (just changing the chainless double crochet with a chainless half double for this beanie).
Materials:
-Worsted weight (level 4) yarn, about 150 yards- I used half a skein of Lion Brand Jeans Colors in Corduroy
-Size I/9 5.5mm Crochet Hook
-Stitch Markers (optional)
-Sewing Needle
-Fur Pom or Yarn Pom (Optional)
Final Measurments: 8.5”/22cm wide, 9.5”/24cm tall, 18”/46cm circumference
Pattern:
Beanie Band:
CH 11.
R1: HDC in 2nd CH from the hook. HDC to end. (10 HDC)
R2: CH 1, turn. HDC in the back loop of each HDC across (10 HDC).
Repeat R2 until band measures 18 in. long (adjust as needed, should wrap around head fully), about 42 rows.
SL ST band edges together.

Beanie Body:
R1: SC around the hat band, making sure to end in an even number (62 SC with a 42 row band). Invisible slip stitch (or regular slip stitch) to first SC.
R2: Make a chainless HDC. Place a stitch marker in the top of the HDC (optional). *Skip 1 SC, HDCV in the next SC*. Repeat from * to * around, with the last HDCV in the 2nd to last SC. SK last SC and SL ST to the chainless HDC. (30 HDCV + 1 HDC)

R3: Make a chainless HDC. Place a stitch marker in the top of the HDC (optional). HDCV in the chain space of each HDCV from the previous row. SL ST to the 1st chainless HDC. (30 HDCV + 1 HDC)
Repeat R3 for 18 rows of HDCV stitches total. (Add a couple more rows for a slouchier beanie or less for a shorter beanie.)
R19: Chainless HDC. *1 HDCV in first HDCV, 1 HDC in next HDCV*, repeat * to * around. SL ST to chainless HDC.
R20: 1 HDC in each HDCV CH space and each single HDC around. SL ST to chainless HDC.
R21: HDC2TOG around each HDC. SL ST to chainless HDC.
R22: HDC2TOG around each HDC2TOG. SL ST to chainless HDC.
Pull up a long tail after final SL ST and whip stitch around the final HDC2TOG’s, pulling tight. Use tail to attach a fur or yarn pom, tie off.

That’s it! I hope you make your own Braeburn Beanie and take it apple picking on a chilly (but sunny!) fall day!

This is an original pattern by Christina of February Sky Designs. Please do not claim this pattern as your own. If you wish to share this pattern, you may link to it but please do not reprint it on your site or sell it.
You may sell products made from this pattern but please clearly credit the design to me, Christina of February Sky Designs, and link to my blog februaryskydesigns.com. Thank you for respecting creators and their work!

