


When I decided to teach myself to knit it felt like a tall mountain to climb. Maybe because I learned to crochet first, but knitting seemed intimidating and finicky. How to hold the needles, how many stitches to cast on, what abbreviations mean, how long it takes compared to crochet- these are all obstacles I had to overcome before I could complete my first wonky hat. But that hat gave me a sense of accomplishment that was addicting, and I went on a knit hat bender, making at least one that I was actually happy with. It turns out that with bulky yarn and big needles a hat doesn’t actually take that long!
So if you have some basic knitting skills and want an easy hat that you can finish in a couple of hours, look no further than the Snowy Willow hat . This beginner-friendly project requires that you’re familiar with knitting, but the color work is all down to the yarn you choose and at the end you’ll have a cozy and pretty hat that you can be proud of (and that makes a great gift!).

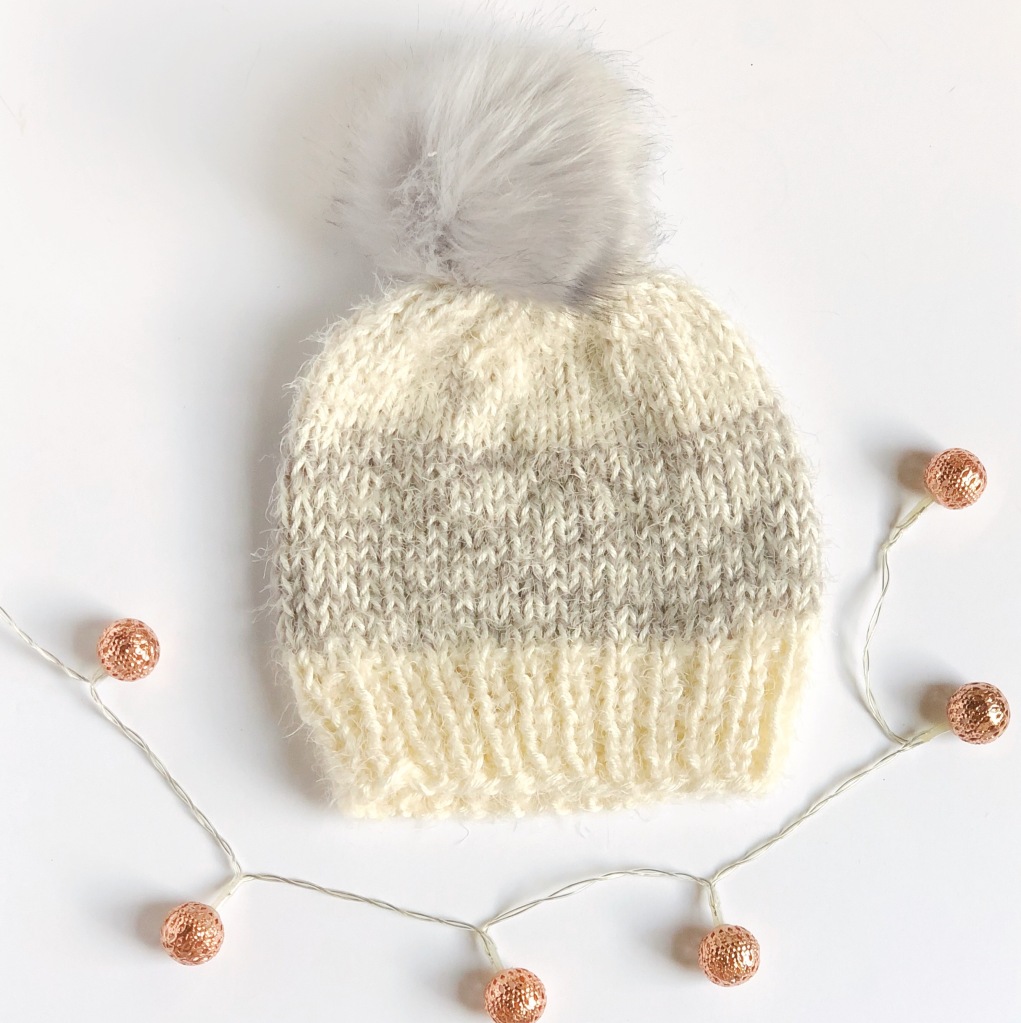
I made two versions of the hat- one using two strands of Caron Latte Cakes held together, and one holding Latte Cakes and Simply soft together. Both versions of the hat are ridiculously soft, and depending on the colors you choose and where you pick up the self-striping Latte Cakes yarn you can get some really pretty color changes in your hat, all without changing yarns or having more ends to weave in!
You’ll start off with a long tail cast on using 8mm circular knitting needles, and after joining in the round you’ll make your brim.


The hat brim is a basic rib with alternating knits and purls, and you can make it thicker or thinner by adding or subtracting a couple rows. My brim is about 2 inches after 10 rows.

Once the brim is done you’ll switch to the 9mm needles to make the hat body. This is the quick and easy part as it’s entirely knit stitches, and before you know it you’re ready to finish the hat with a couple rows of decreases!

Below you’ll see the two versions of the hat. The first is made holding two strands of Latte Cakes together and the pom is made of the same yarn, so all you need is one skein to make the whole hat (or two or three hats, as these skeins are huge!). The second hat is made holding Latte Cakes and Simply Soft together and finished with a faux fur pom if you’re feeling a little fancy.

Let’s get to the pattern!
The Snowy Willow Knit Hat Pattern
Materials:
-One skein Caron Latte Cakes (colorway shown is Pepper Ash)
-One skein Caron Simply Soft (colorway shown is Off White) (optional)
-8 mm 16 in. circular knitting needles
-9 mm 16 in. circular knitting needles
-9 mm double pointed needles
-large eye sewing needle
-stitch marker
-fur pom (optional)
Notes:
- This beanie is made by holding two strands of yarn together. You can choose to either hold one strand of Latte Cakes (a level 5 yarn, but on the thin side) with a strand of Simply Soft, or you can hold two strands of Latte Cakes or two strands of Simply Soft of other worsted weight yarn together. Your finished hat size may vary slightly depending on your yarn and tension.
- Techniques you’ll need to know prior to following this pattern are the long tail cast on, joining in the round, the knit stitch, the purl stitch, and knitting two stitches together.
- 10 rows of ribbing measures about 2 inches, so increase or decrease rows as you prefer.
- If adding or subtracting stitches from the initial cast-on to adjust the size of the hat, make sure you keep the total number a multiple of 2.
Pattern:
To begin, hold two strands of yarn and use the 8 mm needles to cast on 56 stitches using the long tail cast on method (or your preferred cast on method). C/o 57 stitches if using the invisible join method, which drops a stitch and ends up with 56 active stitches. Place a stitch marker to assist in counting rows.
Switch to 9 mm needles.
R1-10: *K1, P1* around. (56 sts)
R11 and up: Knit around until hat measures 8” including ribbing.
Decrease row 1: *K1, K2tog*, repeat around.
Decrease R2: Knit around.
*If you have double pointed needles, switch to those now. If not, either continue last two rows with circular needles or thread end through loops now.
Decrease R3: Using DPNs, *K1, K2tog*, evenly distributing stitches on 2 or 3 needles.
Decrease R4: Knit around.
Decrease R5: K2tog. Repeat around. Using a long tail, thread through each loop on the needles, remove needles and pull tight. Attach pom of your choice and weave in ends.
Finished dimensions:
8.5″/21.6 cm wide (at body when flat), 8.5″/21.6 cm in height

This is an original pattern by Christina of February Sky Designs. Please do not claim this pattern as your own. If you wish to share this pattern, you may link to it but please do not reprint it on your site or sell it.
You may sell products made from this pattern but please clearly credit the design to me, Christina of February Sky Designs, and link to my blog februaryskydesigns.com. Thank you for respecting creators and their work!


Such a sweet and versatile hat. Thank you for the patternl
Thank you so much!
In the materials, you name 8mm and 9mm needles but in the instructions after cast on you say to switch to 10 mm needles. Which is it?
You’ll use 8mm for the brim and 9mm for the hat body. I’ve removed the typo, thanks for catching that.