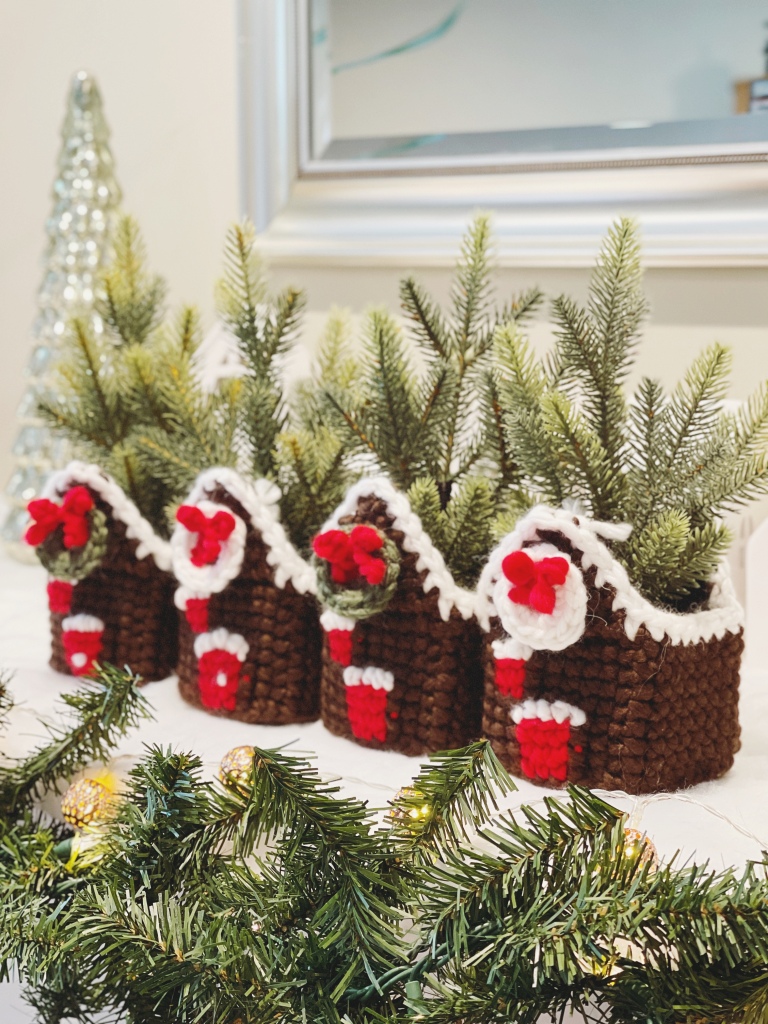
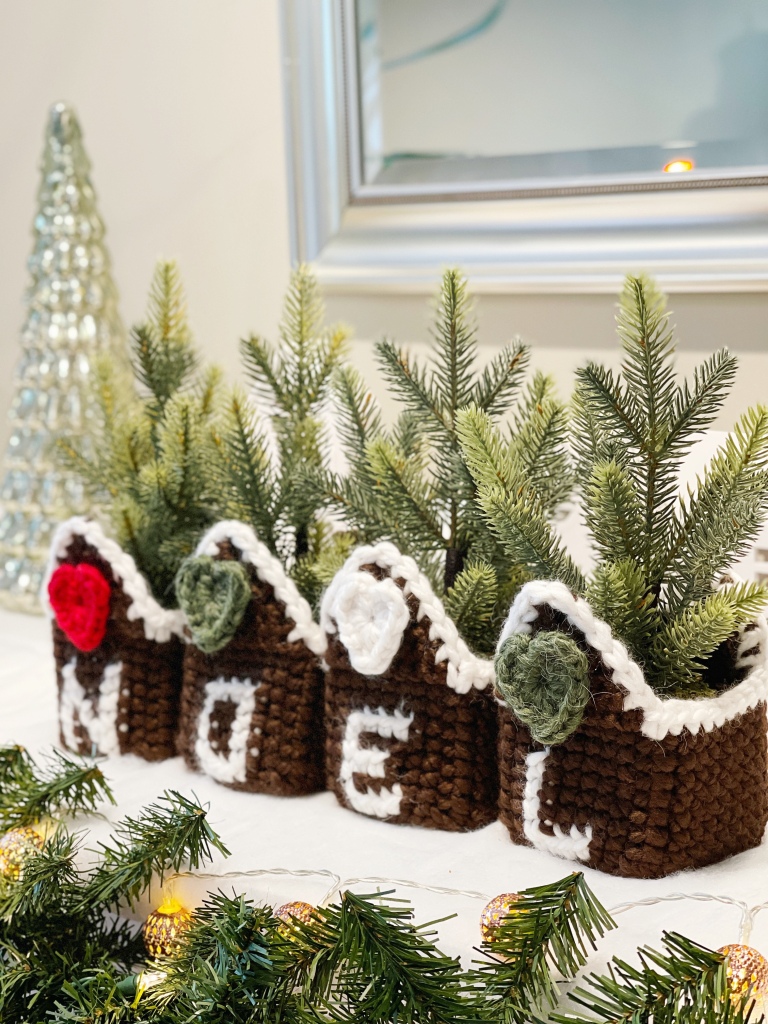
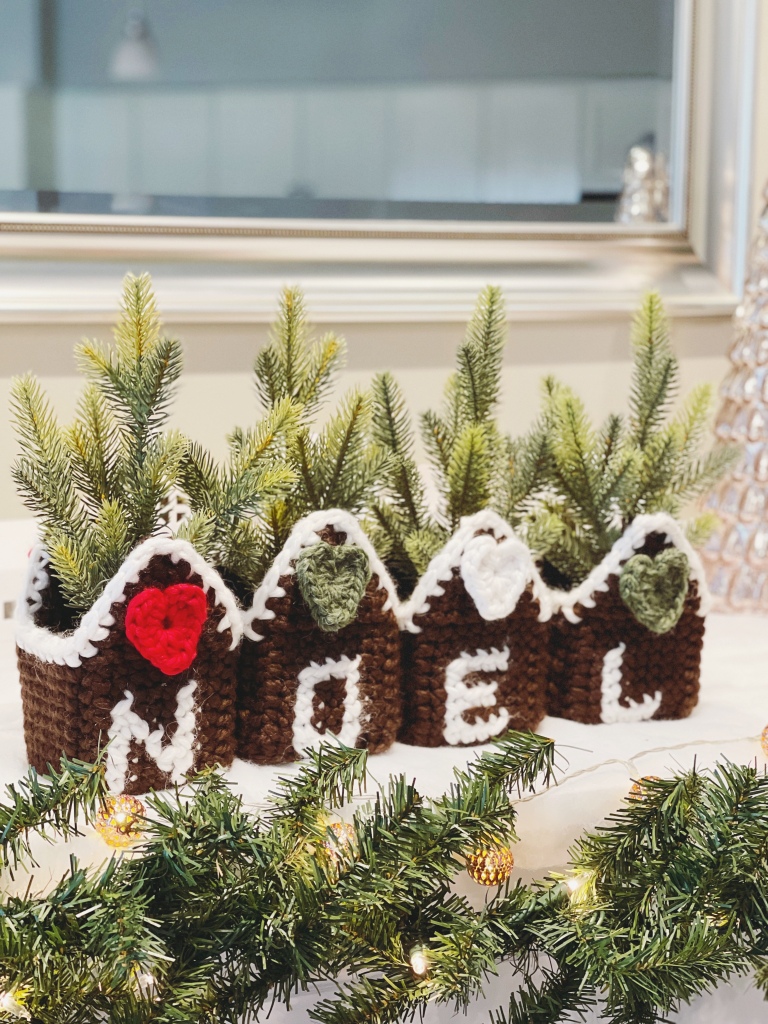
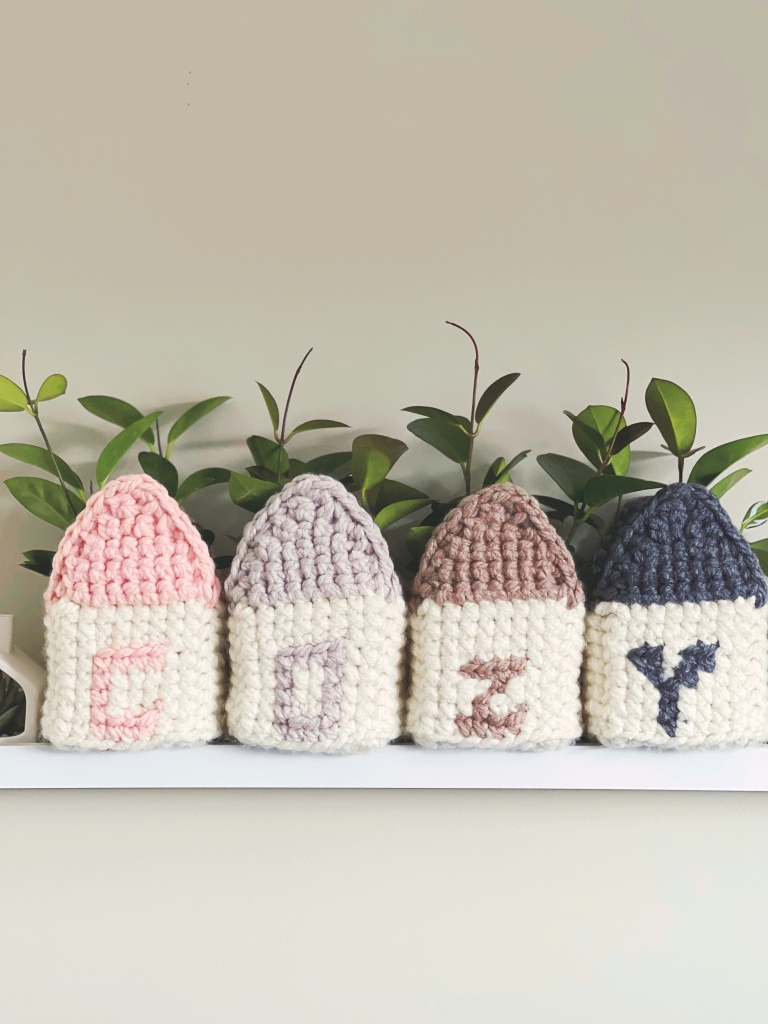
If you’ve been on my Instagram in the past year you know I’m obsessed with my Cozy Cottage planters. My collection of cottages continues to grow, and I’m so excited to add these little gingerbread houses to the mix!

Since I released the pattern for my Cozy Cottage planters earlier this year, I’ve made cottages for all seasons!
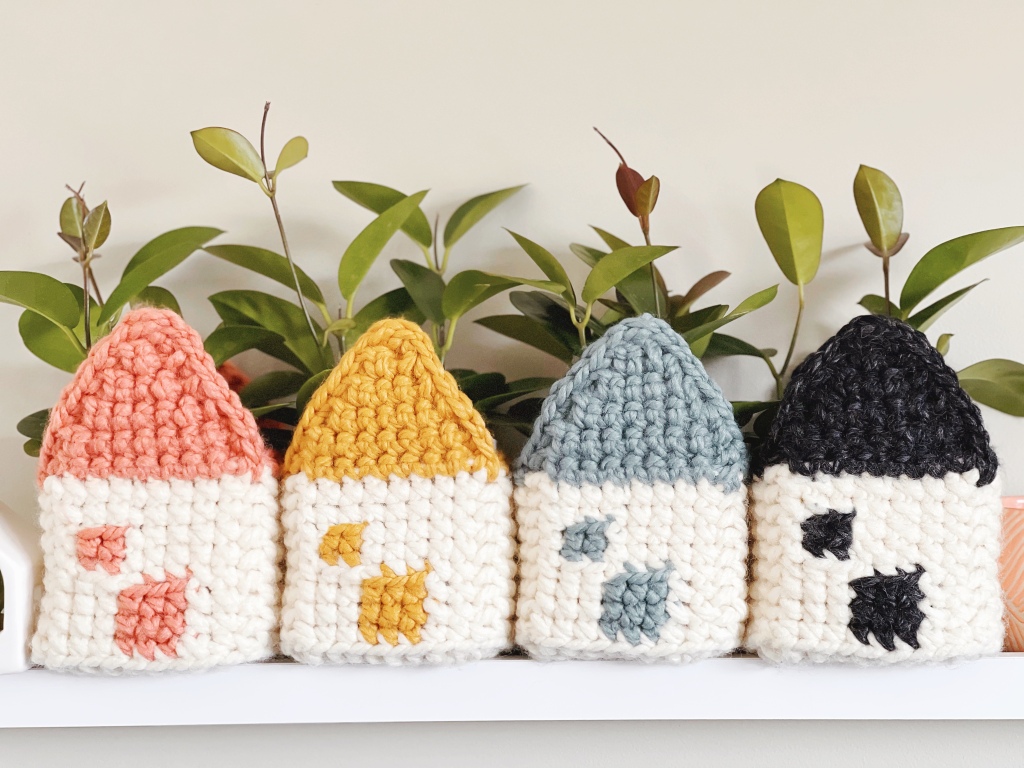
Winter:

SpringSummer:

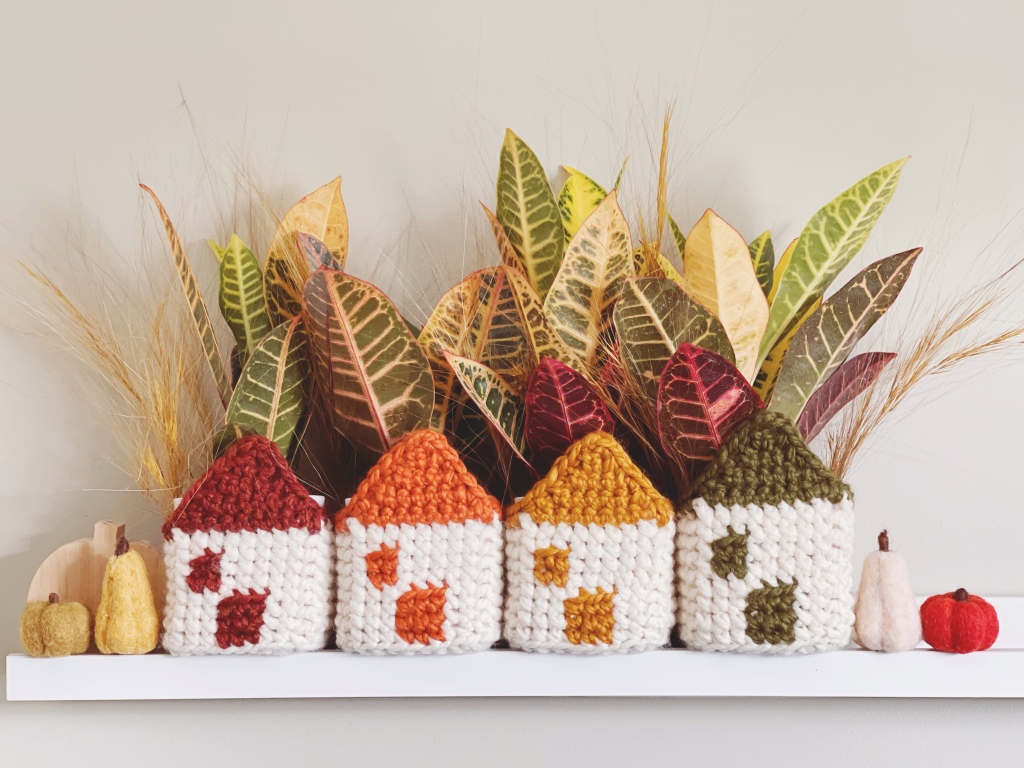
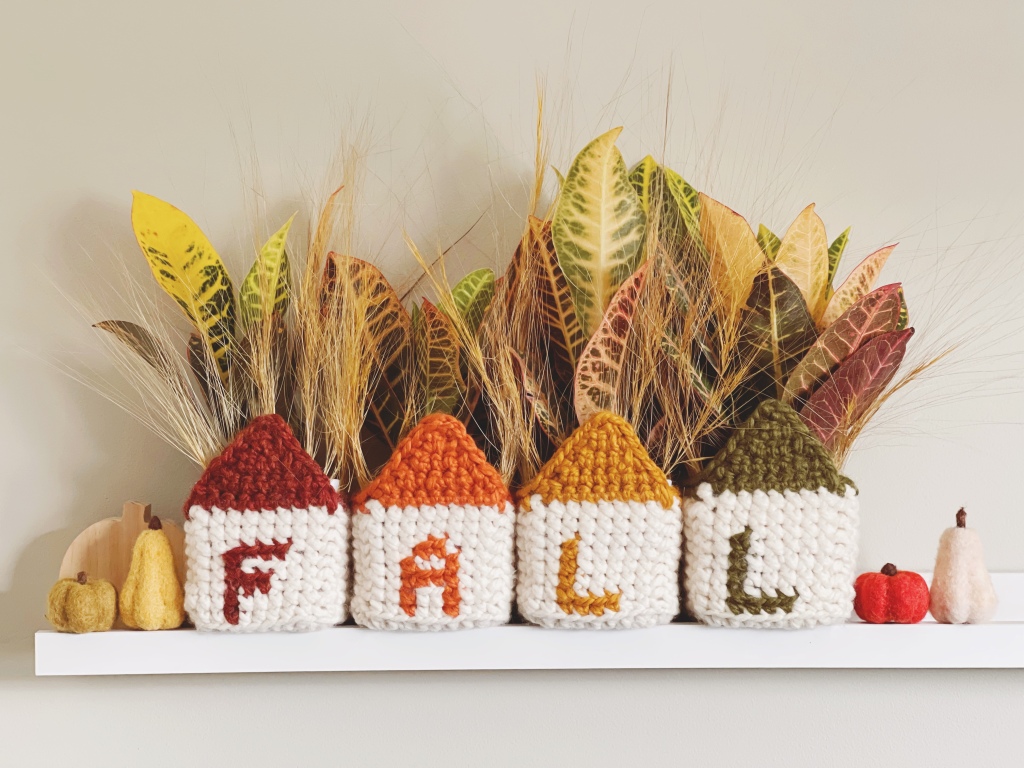
Fall:
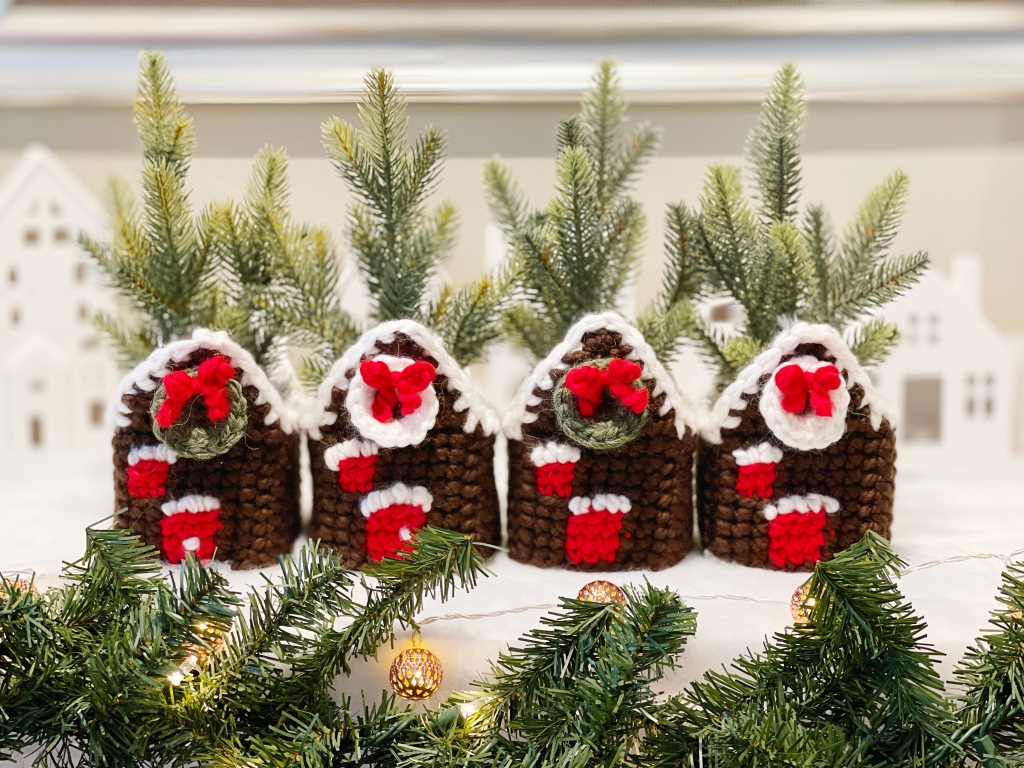
But from the beginning I had these gingerbread cottages planned for Christmas! My inspiration for these planters was partially the ceramic village I put up on my mantle for the holidays, and these fit right in!


This post serves as a supplement to my Cozy Cottage Planter pattern and will go over the changes and additions I made for the gingerbread version. So, before you continue reading, go grab the pattern here, then come back and create your own cozy gingerbread cottages for your tiny trees (real or fake!).
Yarn used (per cottage):
-45 yards of super bulky yarn in your brown shade of choice (pictured is Loops & Threads Cozy Wool in Chocolate)
-a few yards of super bulky yarn in white (pictured is Loops & Threads Lush Alpaca in White)
-a few yards of super bulky yarn in red (pictured is Loops & Threads Cozy Wool in Claret)
-a few yards of another color, like green (pictured is Buttercream Alpaca in Green)
I used a 6 mm hook for both the cottage and the wreath additions.
Changes to pattern:
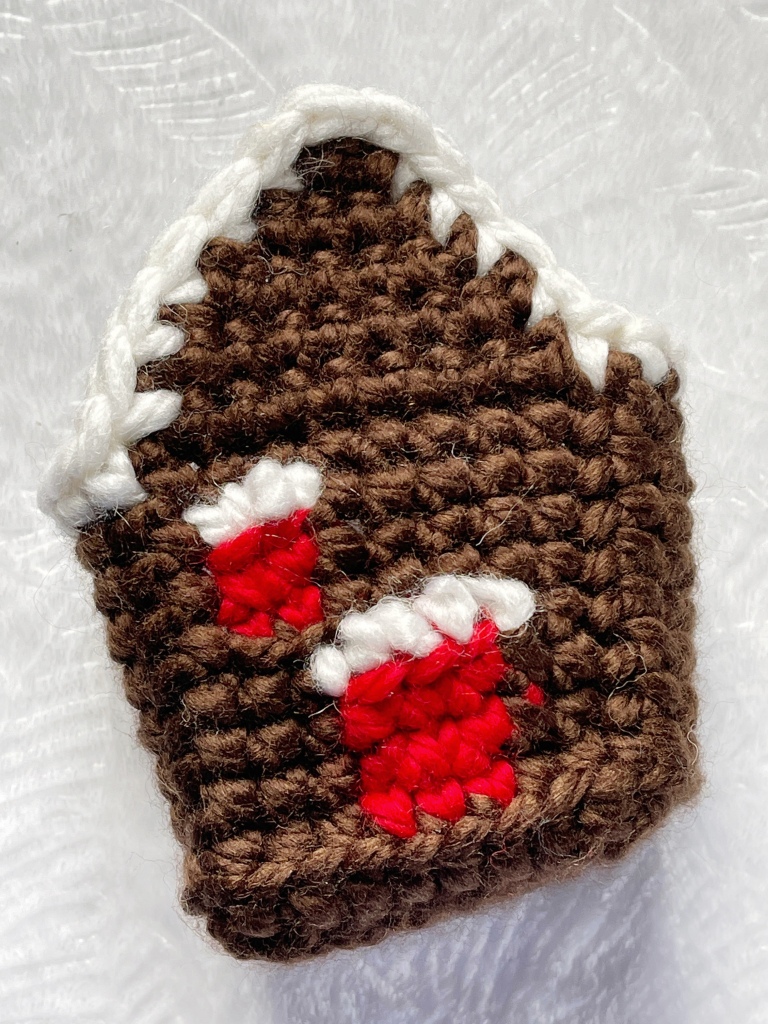
No changes are made until you finish the main body and are ready to move onto the roof. Your brown yarn will be Color A, and then you can choose which colors to make your details with.
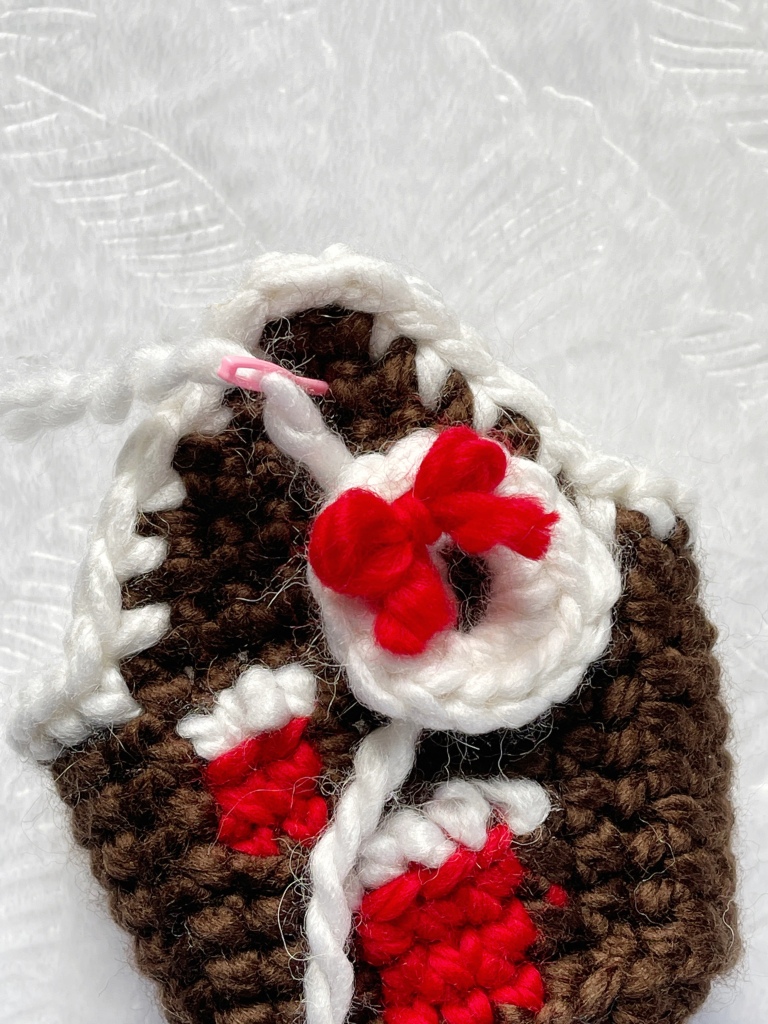
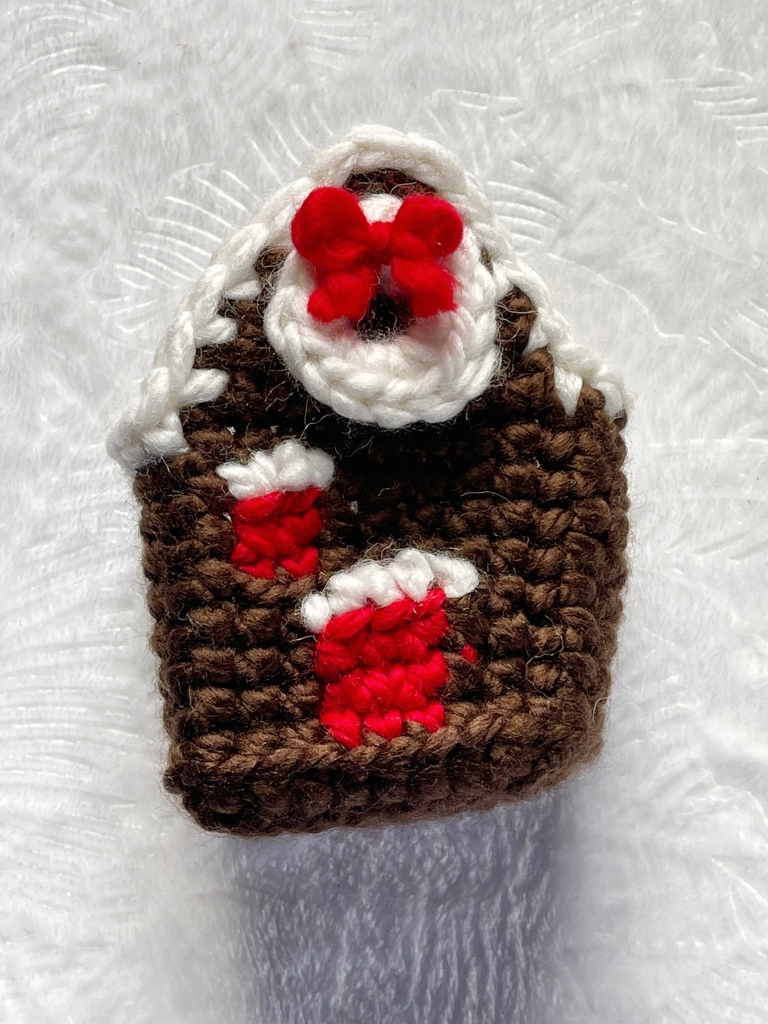
Change to the roof section: Instead of detaching Color A and continuing with Color B, detach and continue the roof section with Color A (brown) per the pattern. Instead of crocheting around the edges of the roof and sides with the brown yarn, detach and complete the second side of the roof up to the edging. Detach brown yarn and attach white yarn to a corner next to a roof side. Single crochet evenly around the roof sides and the cottage sides, then tie off and weave in all ends. Move onto wreaths and details below.
“Icing” on the top of the front window and door:
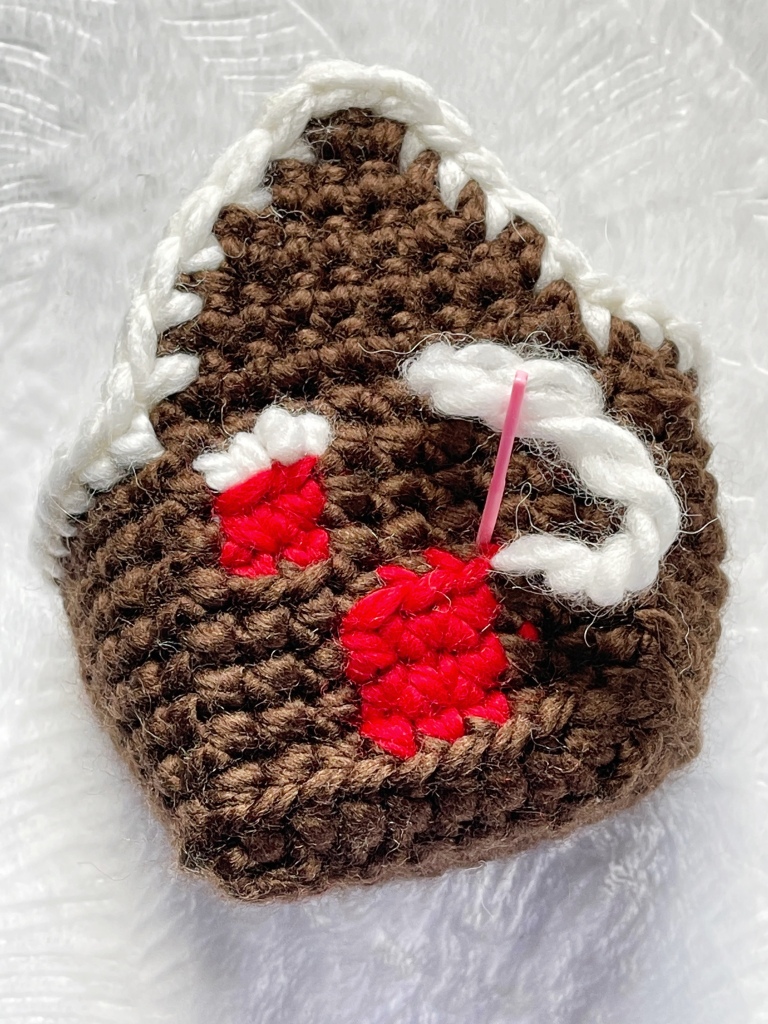
Using your white yarn, thread a sewing needle and whip stitch along the top of the door and window, keeping the stitches loose and fluffy. Add a doorknob if desired.
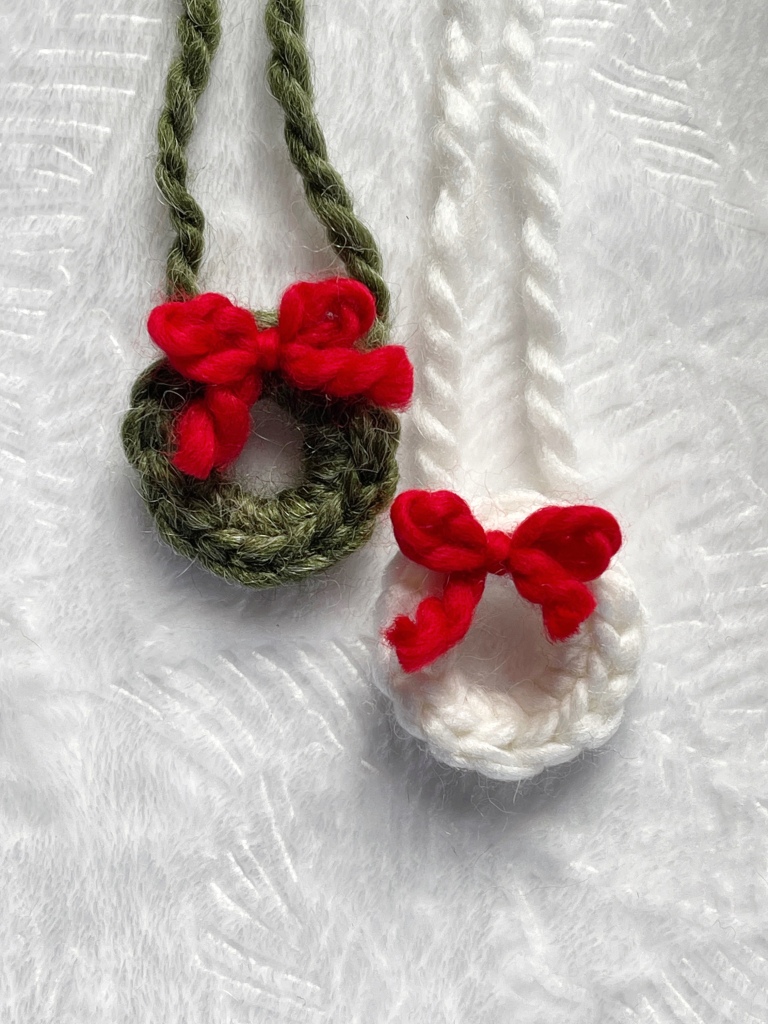
Wreath directions:
Using a color other than brown, make two wreaths for each cottage.
Circle Wreath:
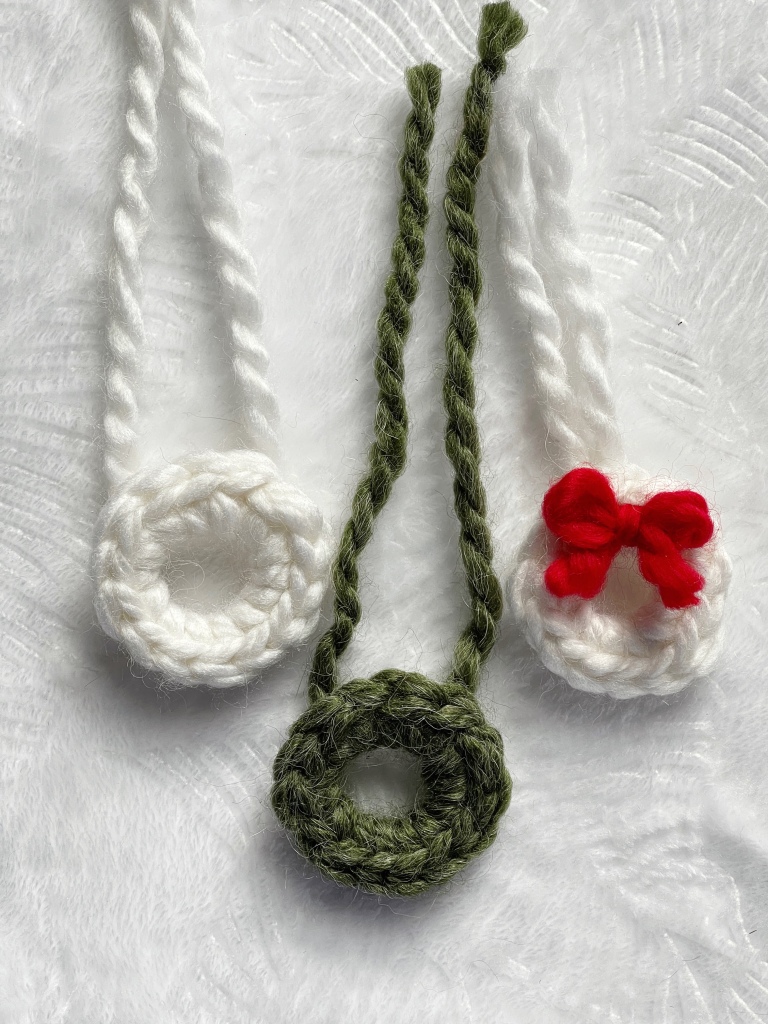
Using super bulky yarn and a 6mm hook, chain 6. Slip stitch to 1st chain to create a ring. Chain 1 and make 14 single crochets inside the chain ring. Slip stitch to the first single crochet and leave a medium length tail. Attach a short strand of red yarn and tie a bow. Attach the wreath to the top of a roof side using the two tails.
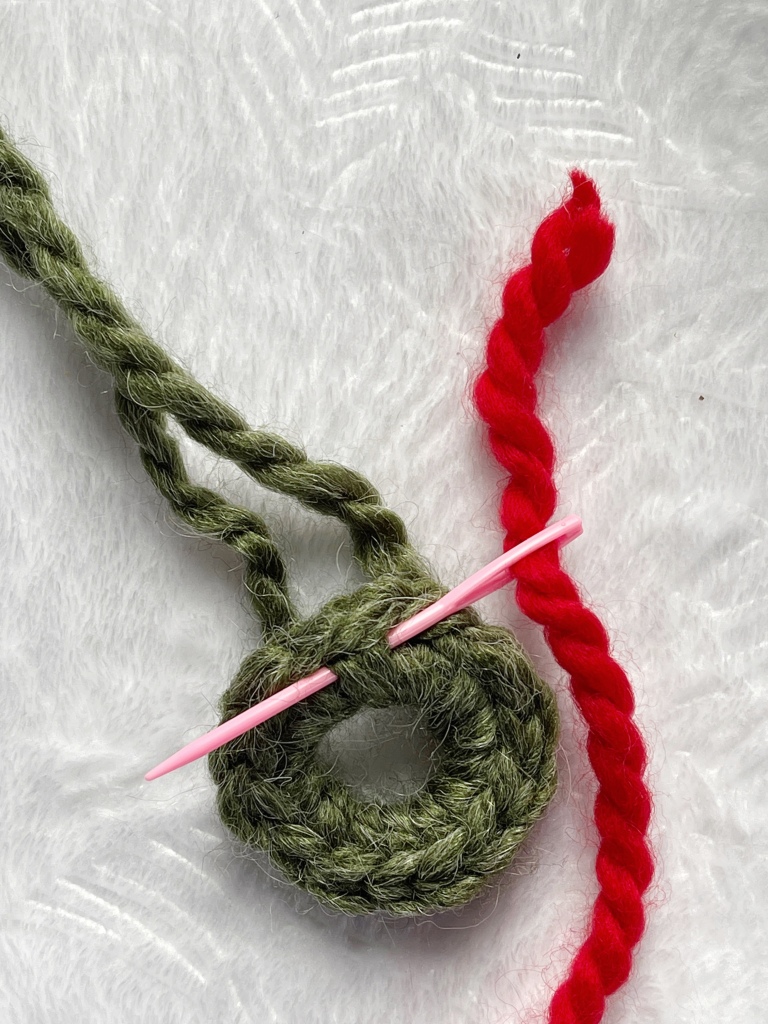
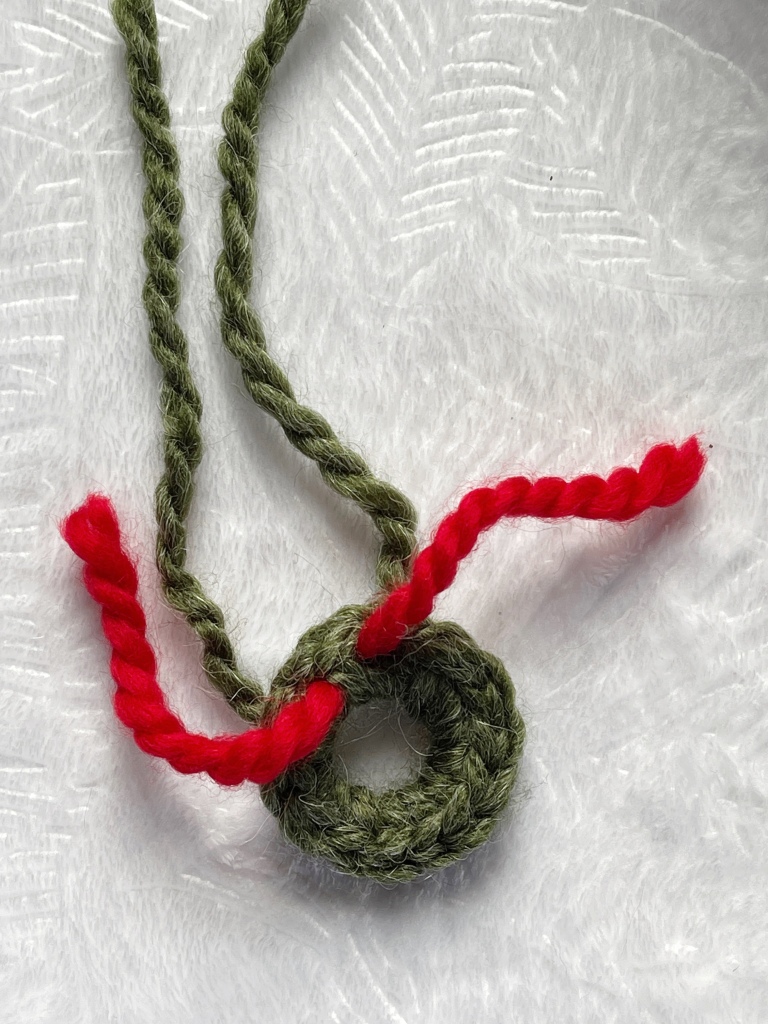
Heart Wreath:
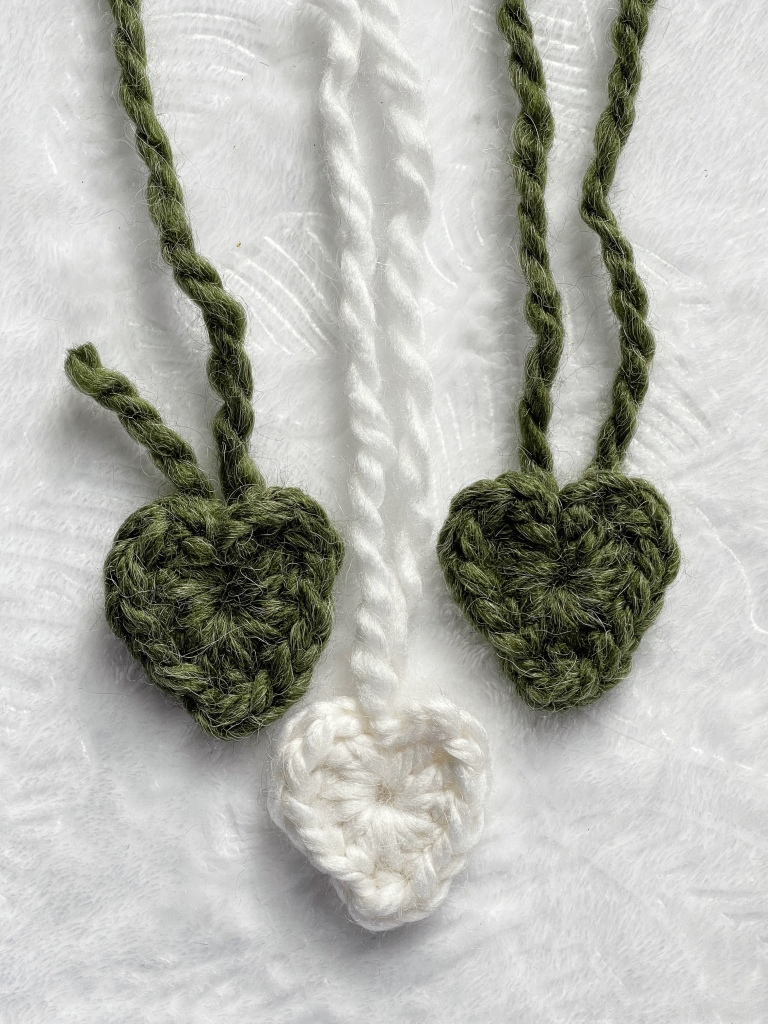
Using super bulky yarn and a 6 mm hook, make a magic circle. Into the MC, CH 2, 2 DC, 3 HDC, CH 1, DC, CH 1, 3 HDC, 2 DC, CH 2. Pull magic circle partially closed and slip stitch into the center. Tighten MC and attach wreath to the second roof side using the two tails.


I hope you love your gingerbread cottages as much as I love mine! If you need the link to the pattern, it’s here. And if you make your own cottages, please share them on Instagram with the hashtag #cozycottageplanters and tag me @Februaryskydesigns. Happy Holidays!